Baking Time
- 15 mins
Servings
- Makes 15 Rolls ( Appox Depending on size )
Ingredients
- 500g Strong White Flour
- 42g Rapeseed Oil
- 7g Fast Acting Dried Yeast
- 5g Caster Sugar
- 5g Sea Salt
- 300ml Warm Water
Dietary information
- Calories ~2,080 kcal
- Carbohydrates ~384 g
- Protein ~60 g
- Fat ~43 g
- Sugar ~7 g
- Fibre ~13 g
- Salt ~5 g
This post may contain affiliate links. If you purchase through these links, I may earn a small commission at no extra cost to you.
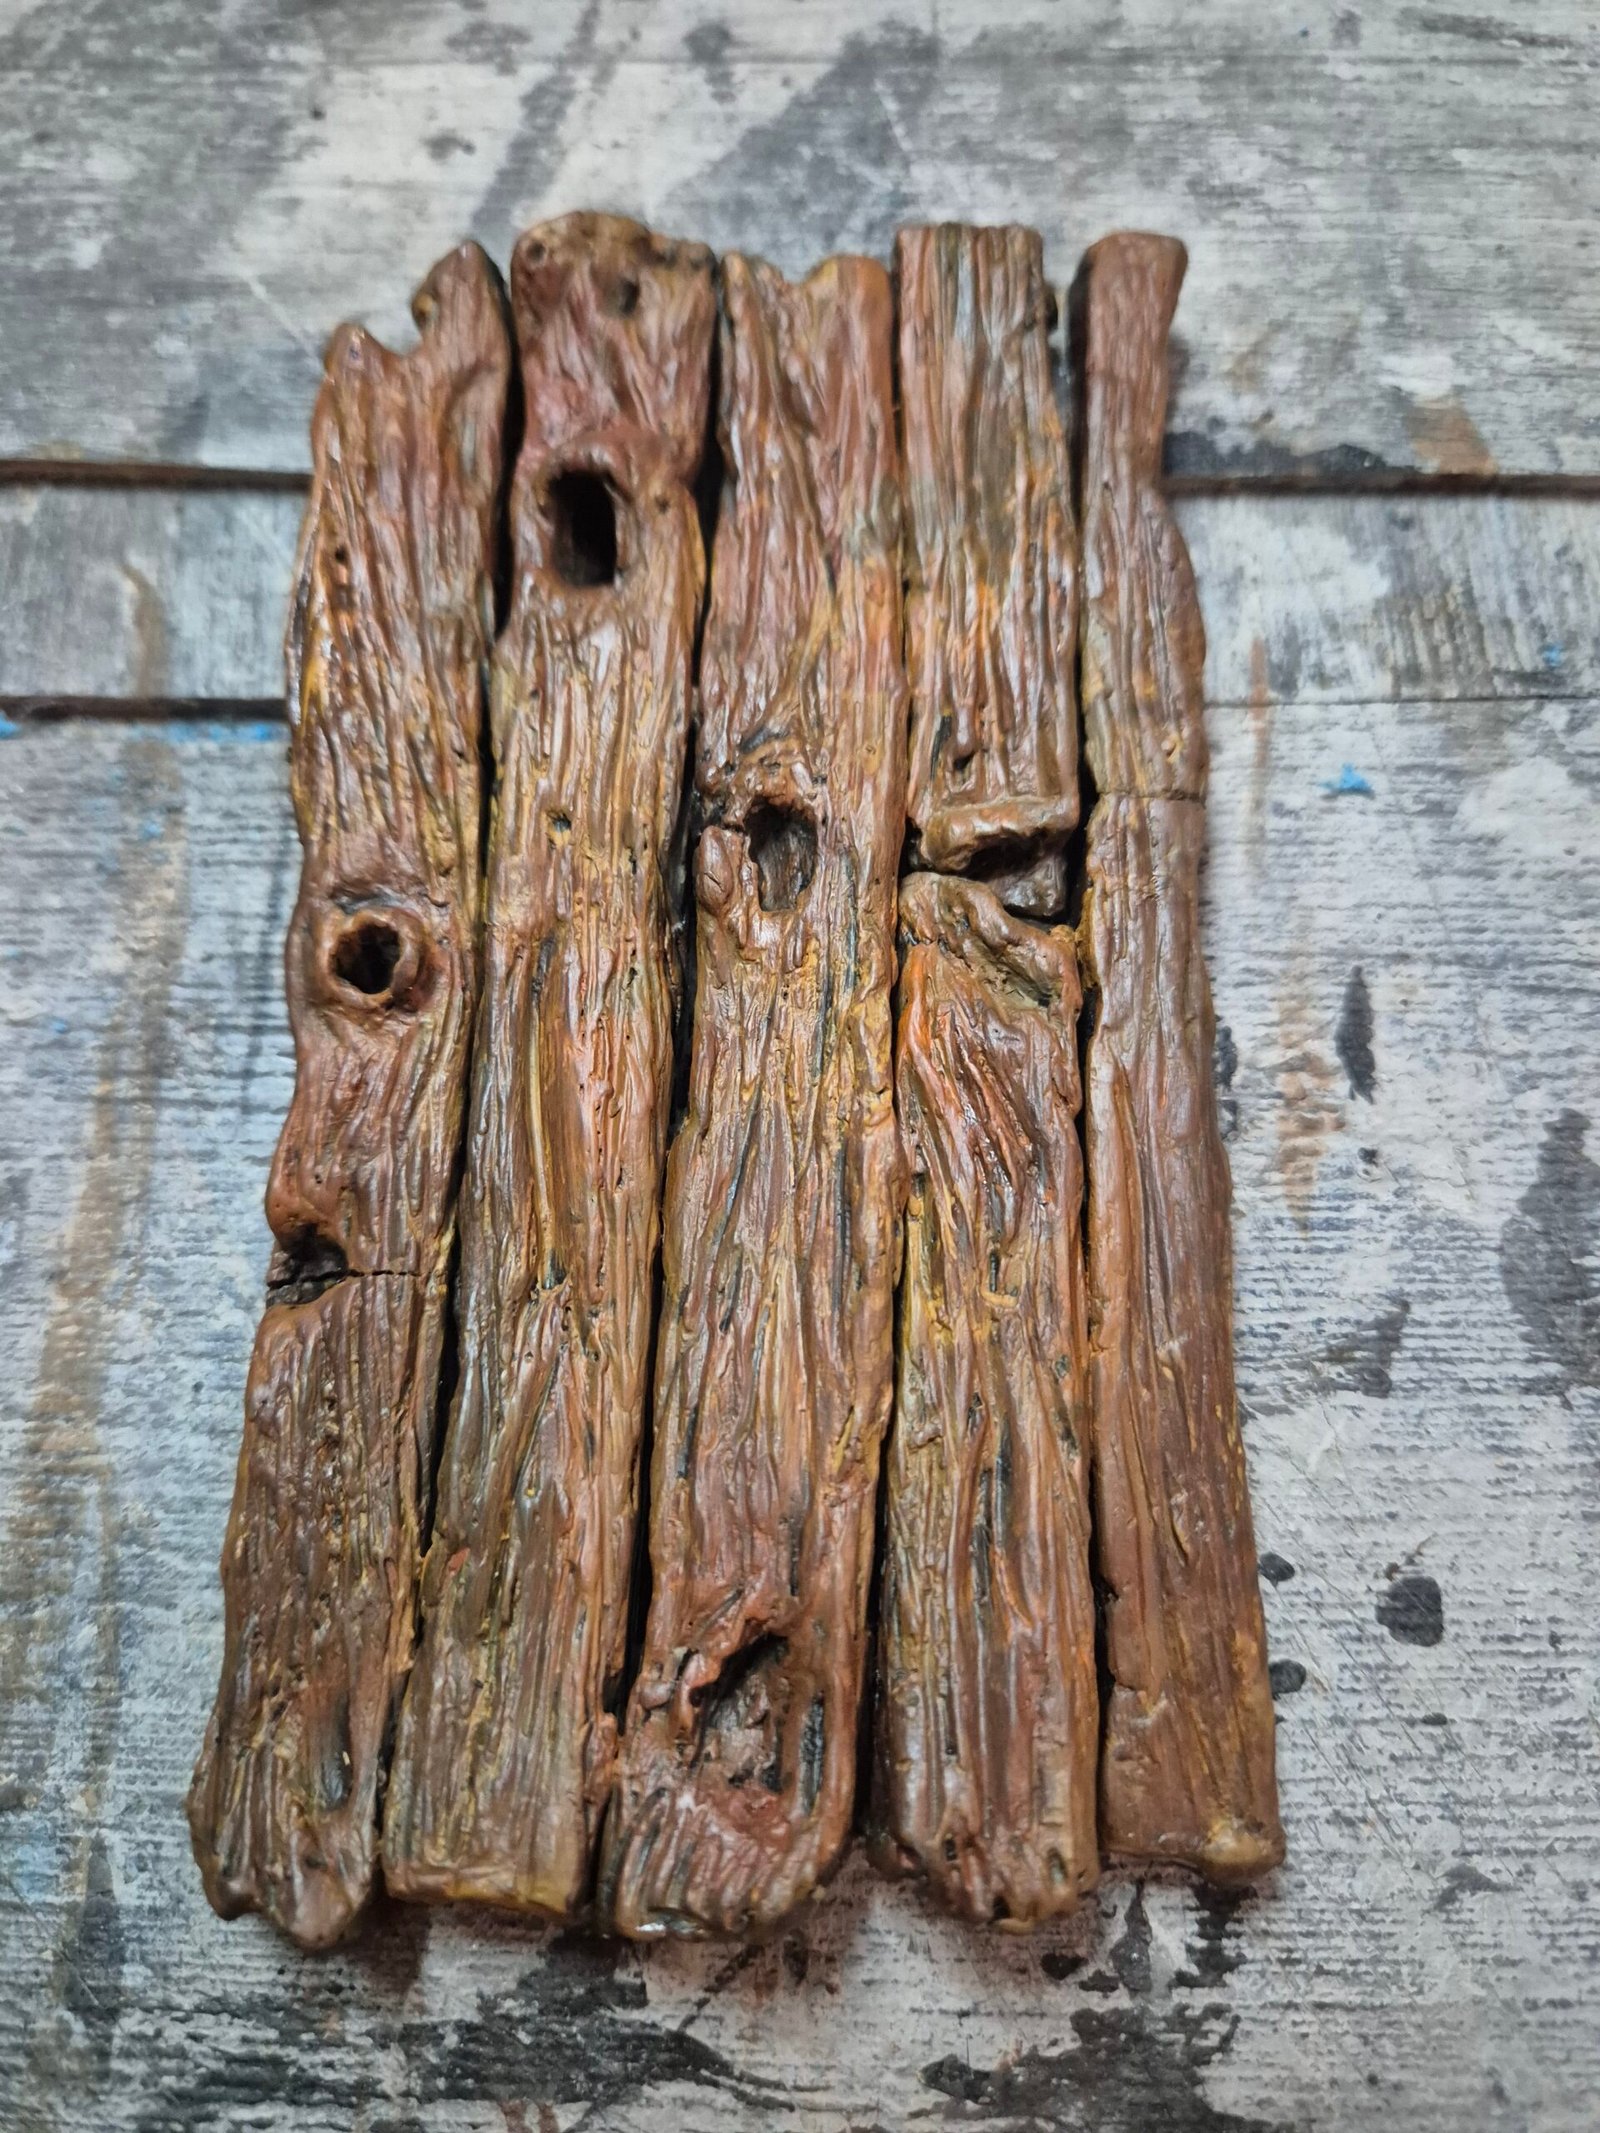
I am currently building a blacksmiths diorama and needed to create, build and design a old style wooden door...
After doing some research online and using AI for inspiration, I had a basic idea of how I wanted the door to look. I wanted something that fitted a medieval setting while keeping a few fantasy elements.
In this case study, I will go through how I created the door from start to finish, covering the initial sculpting, creating the stone frame, fitting it into the diorama base, and finally painting and finishing the model.
Preparing and measuring
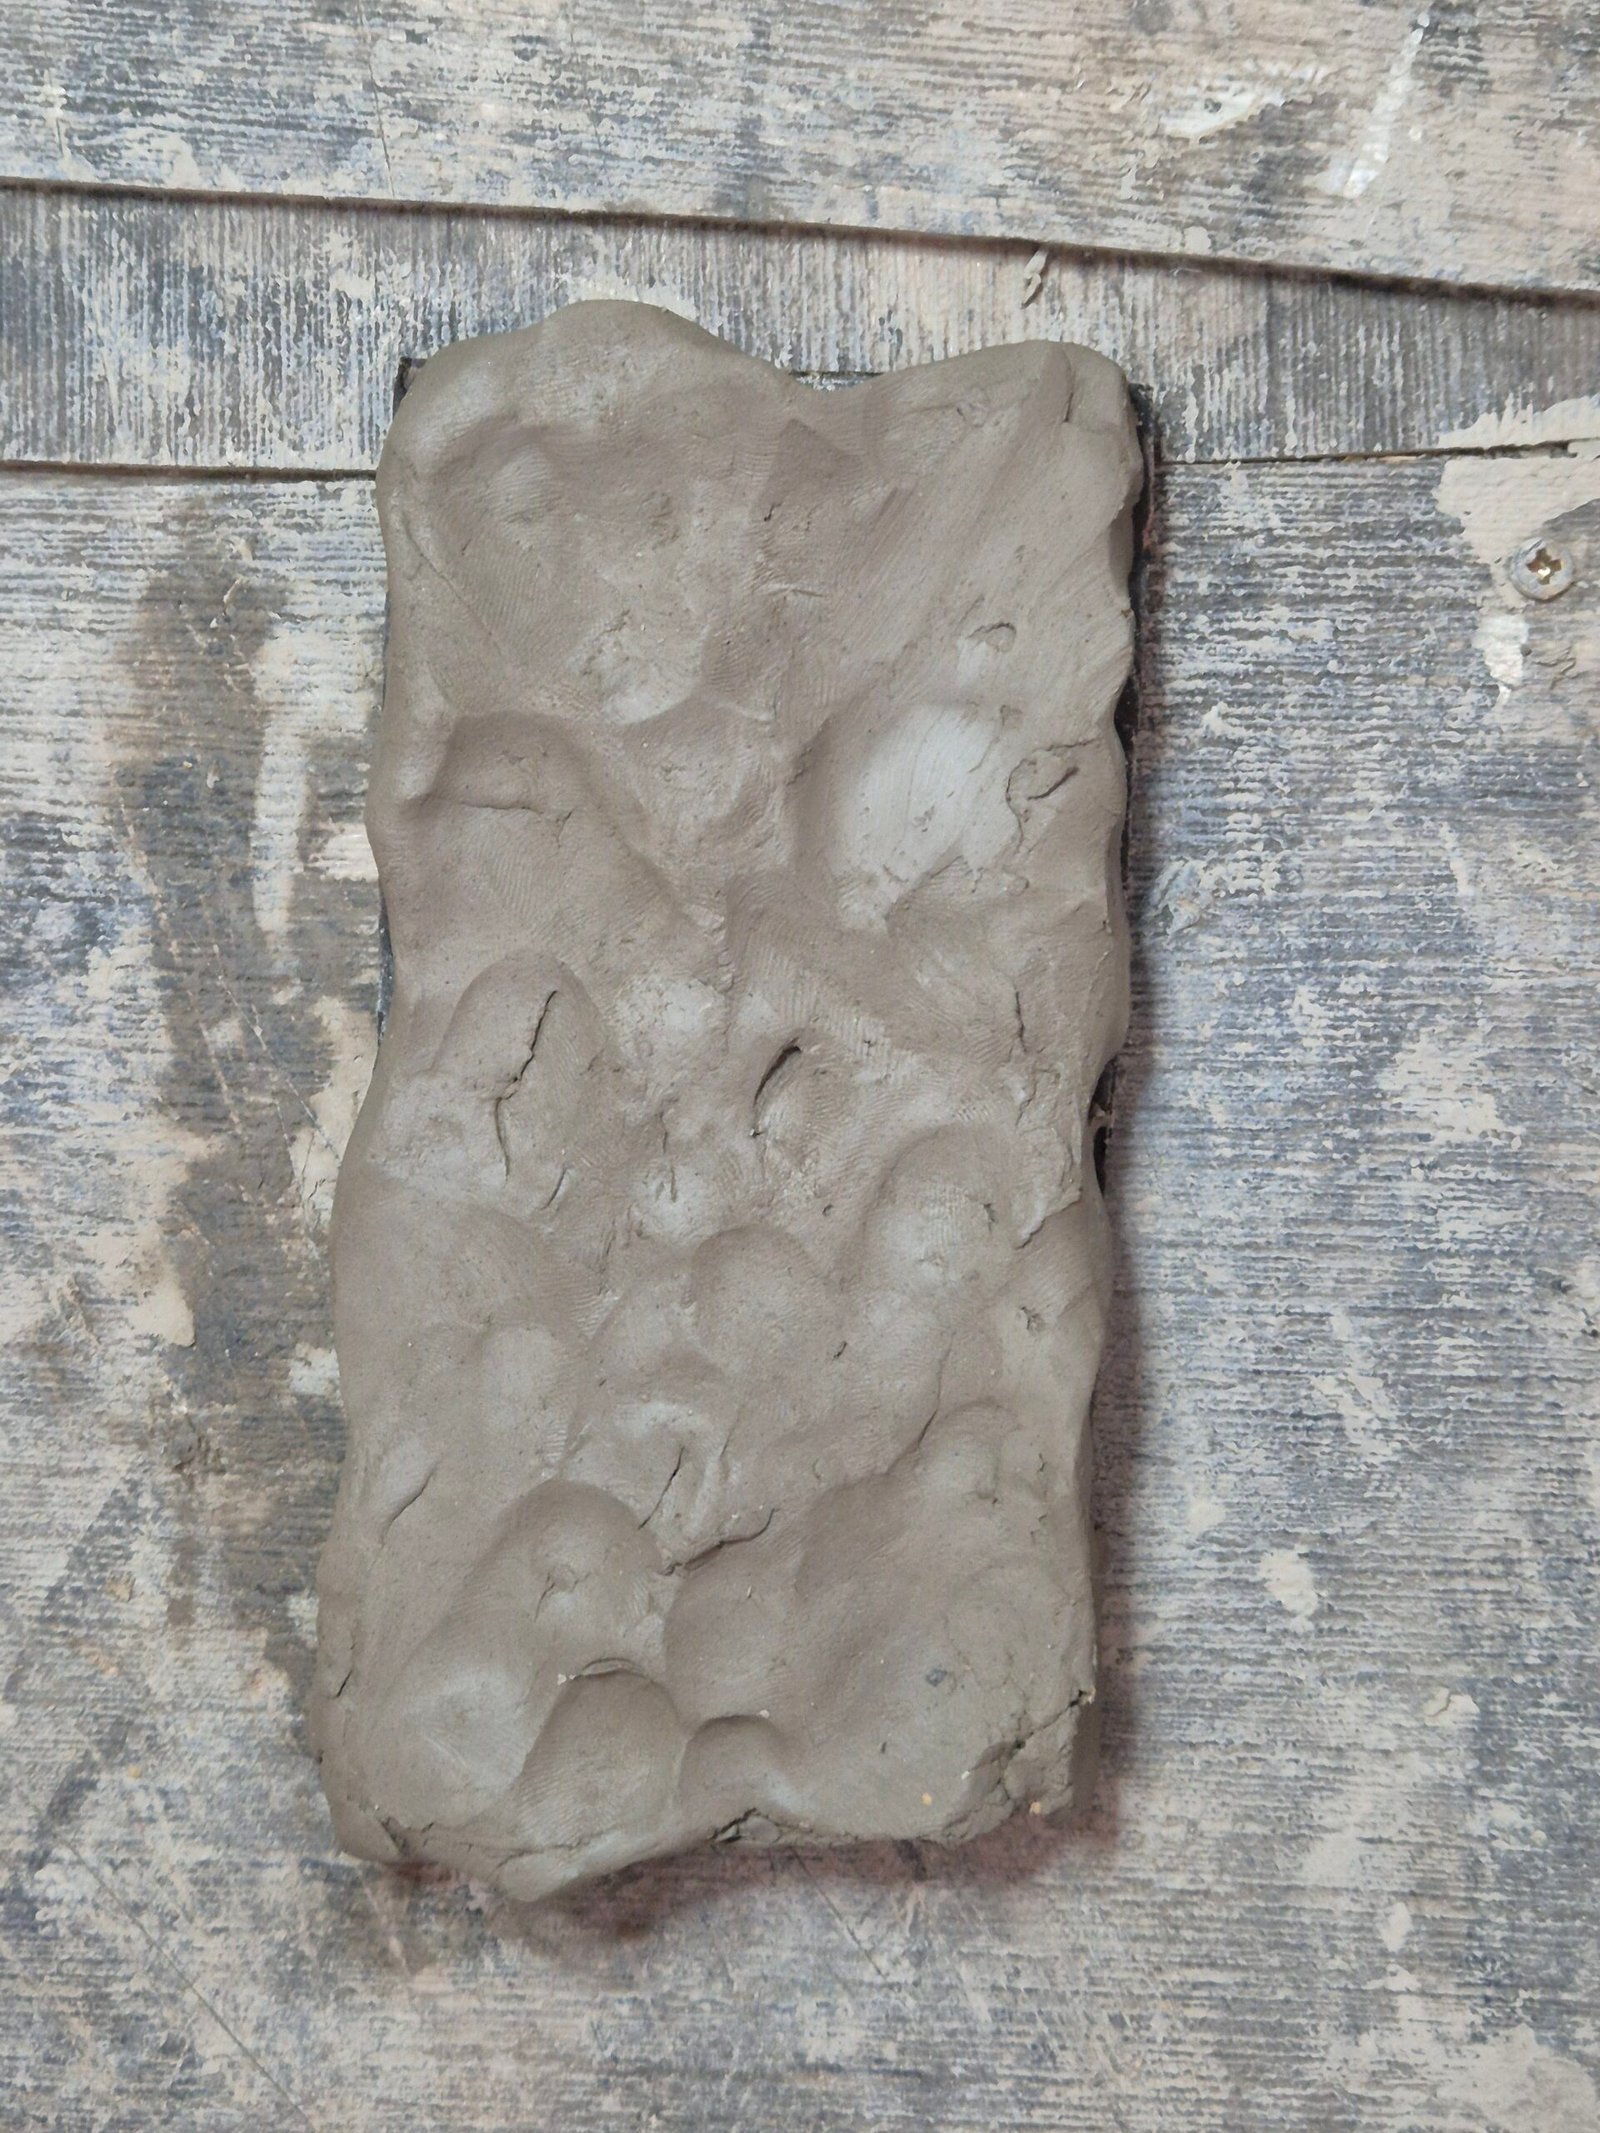
I started by measuring the opening needed for the door. At this point in the diorama I had already started building the brick walls, so I had a good idea of where I wanted the door to sit. After making a few adjustments to the placement, I had the final measurements.
I then cut a simple rectangular backing from cardboard. This would act as the base for the clay door while it dried, making it much easier to move around without damaging the fragile clay. It also makes gluing the finished door into the diorama much easier later on.
Sculpting the Door Out of Clay
Once I had the measurements, I could begin sculpting the door.
The finished door measures:
Height: 140mm
Width: 75mm
Depth: 10mm
I started with a lump of air dry clay and formed it into a basic rectangle before placing it onto the cardboard backing. I then trimmed it down to the correct size.
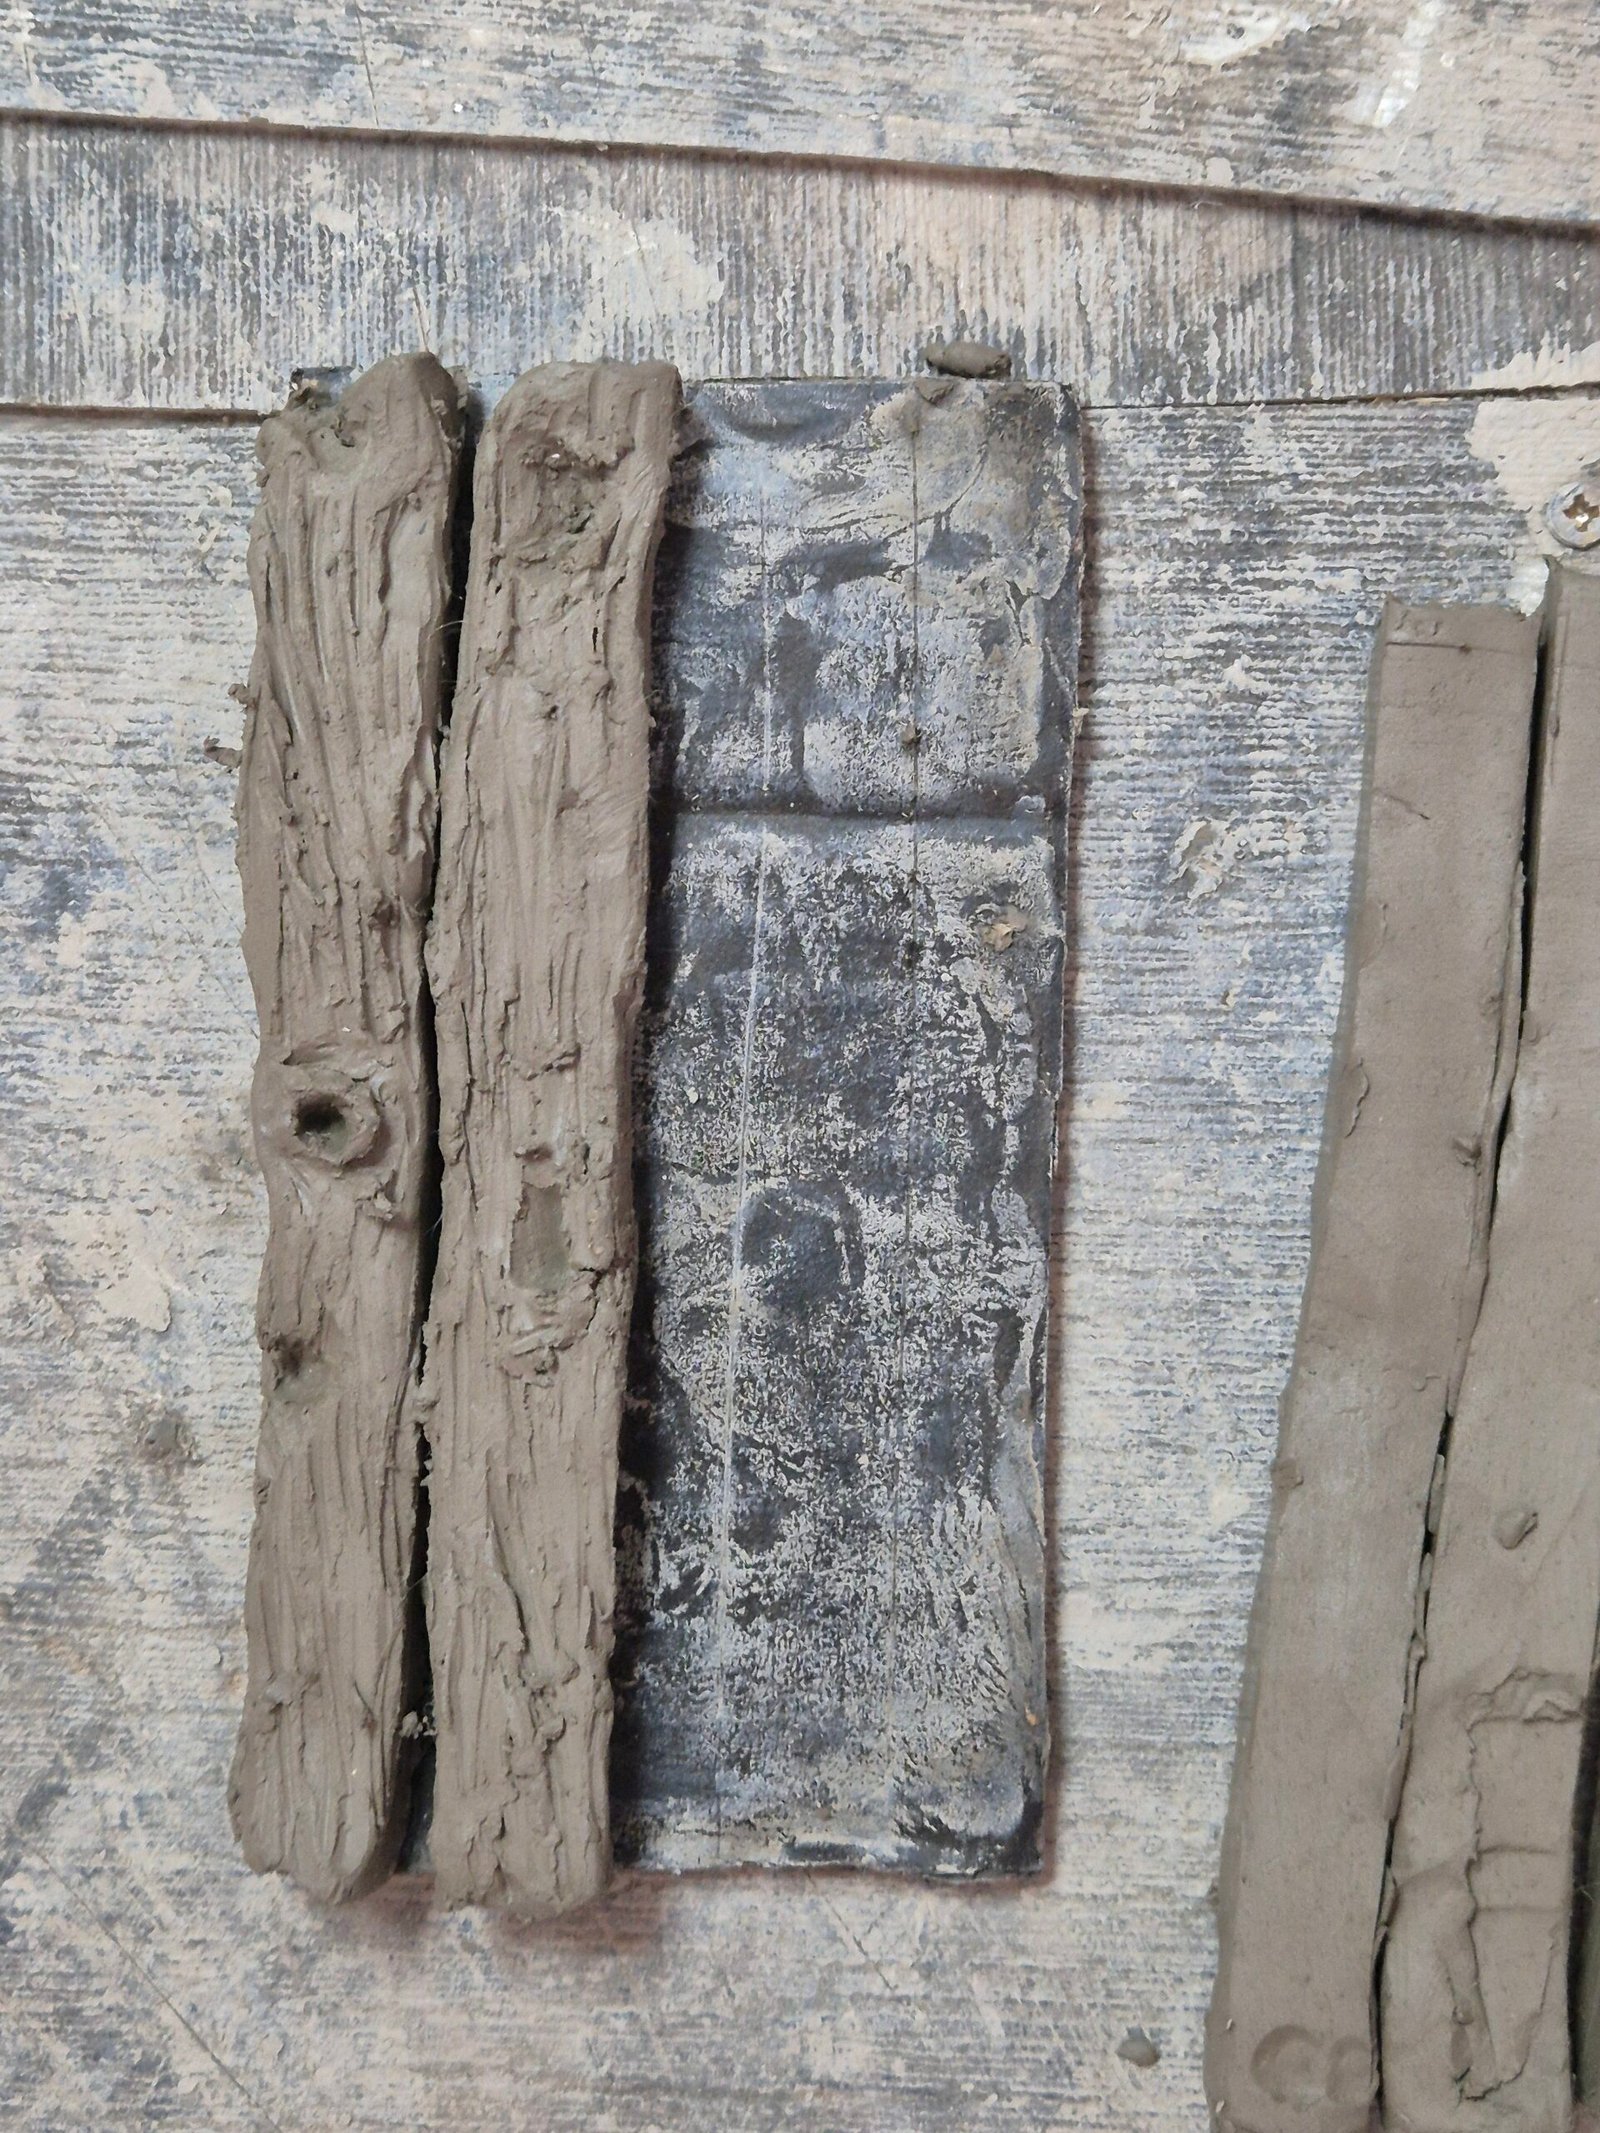
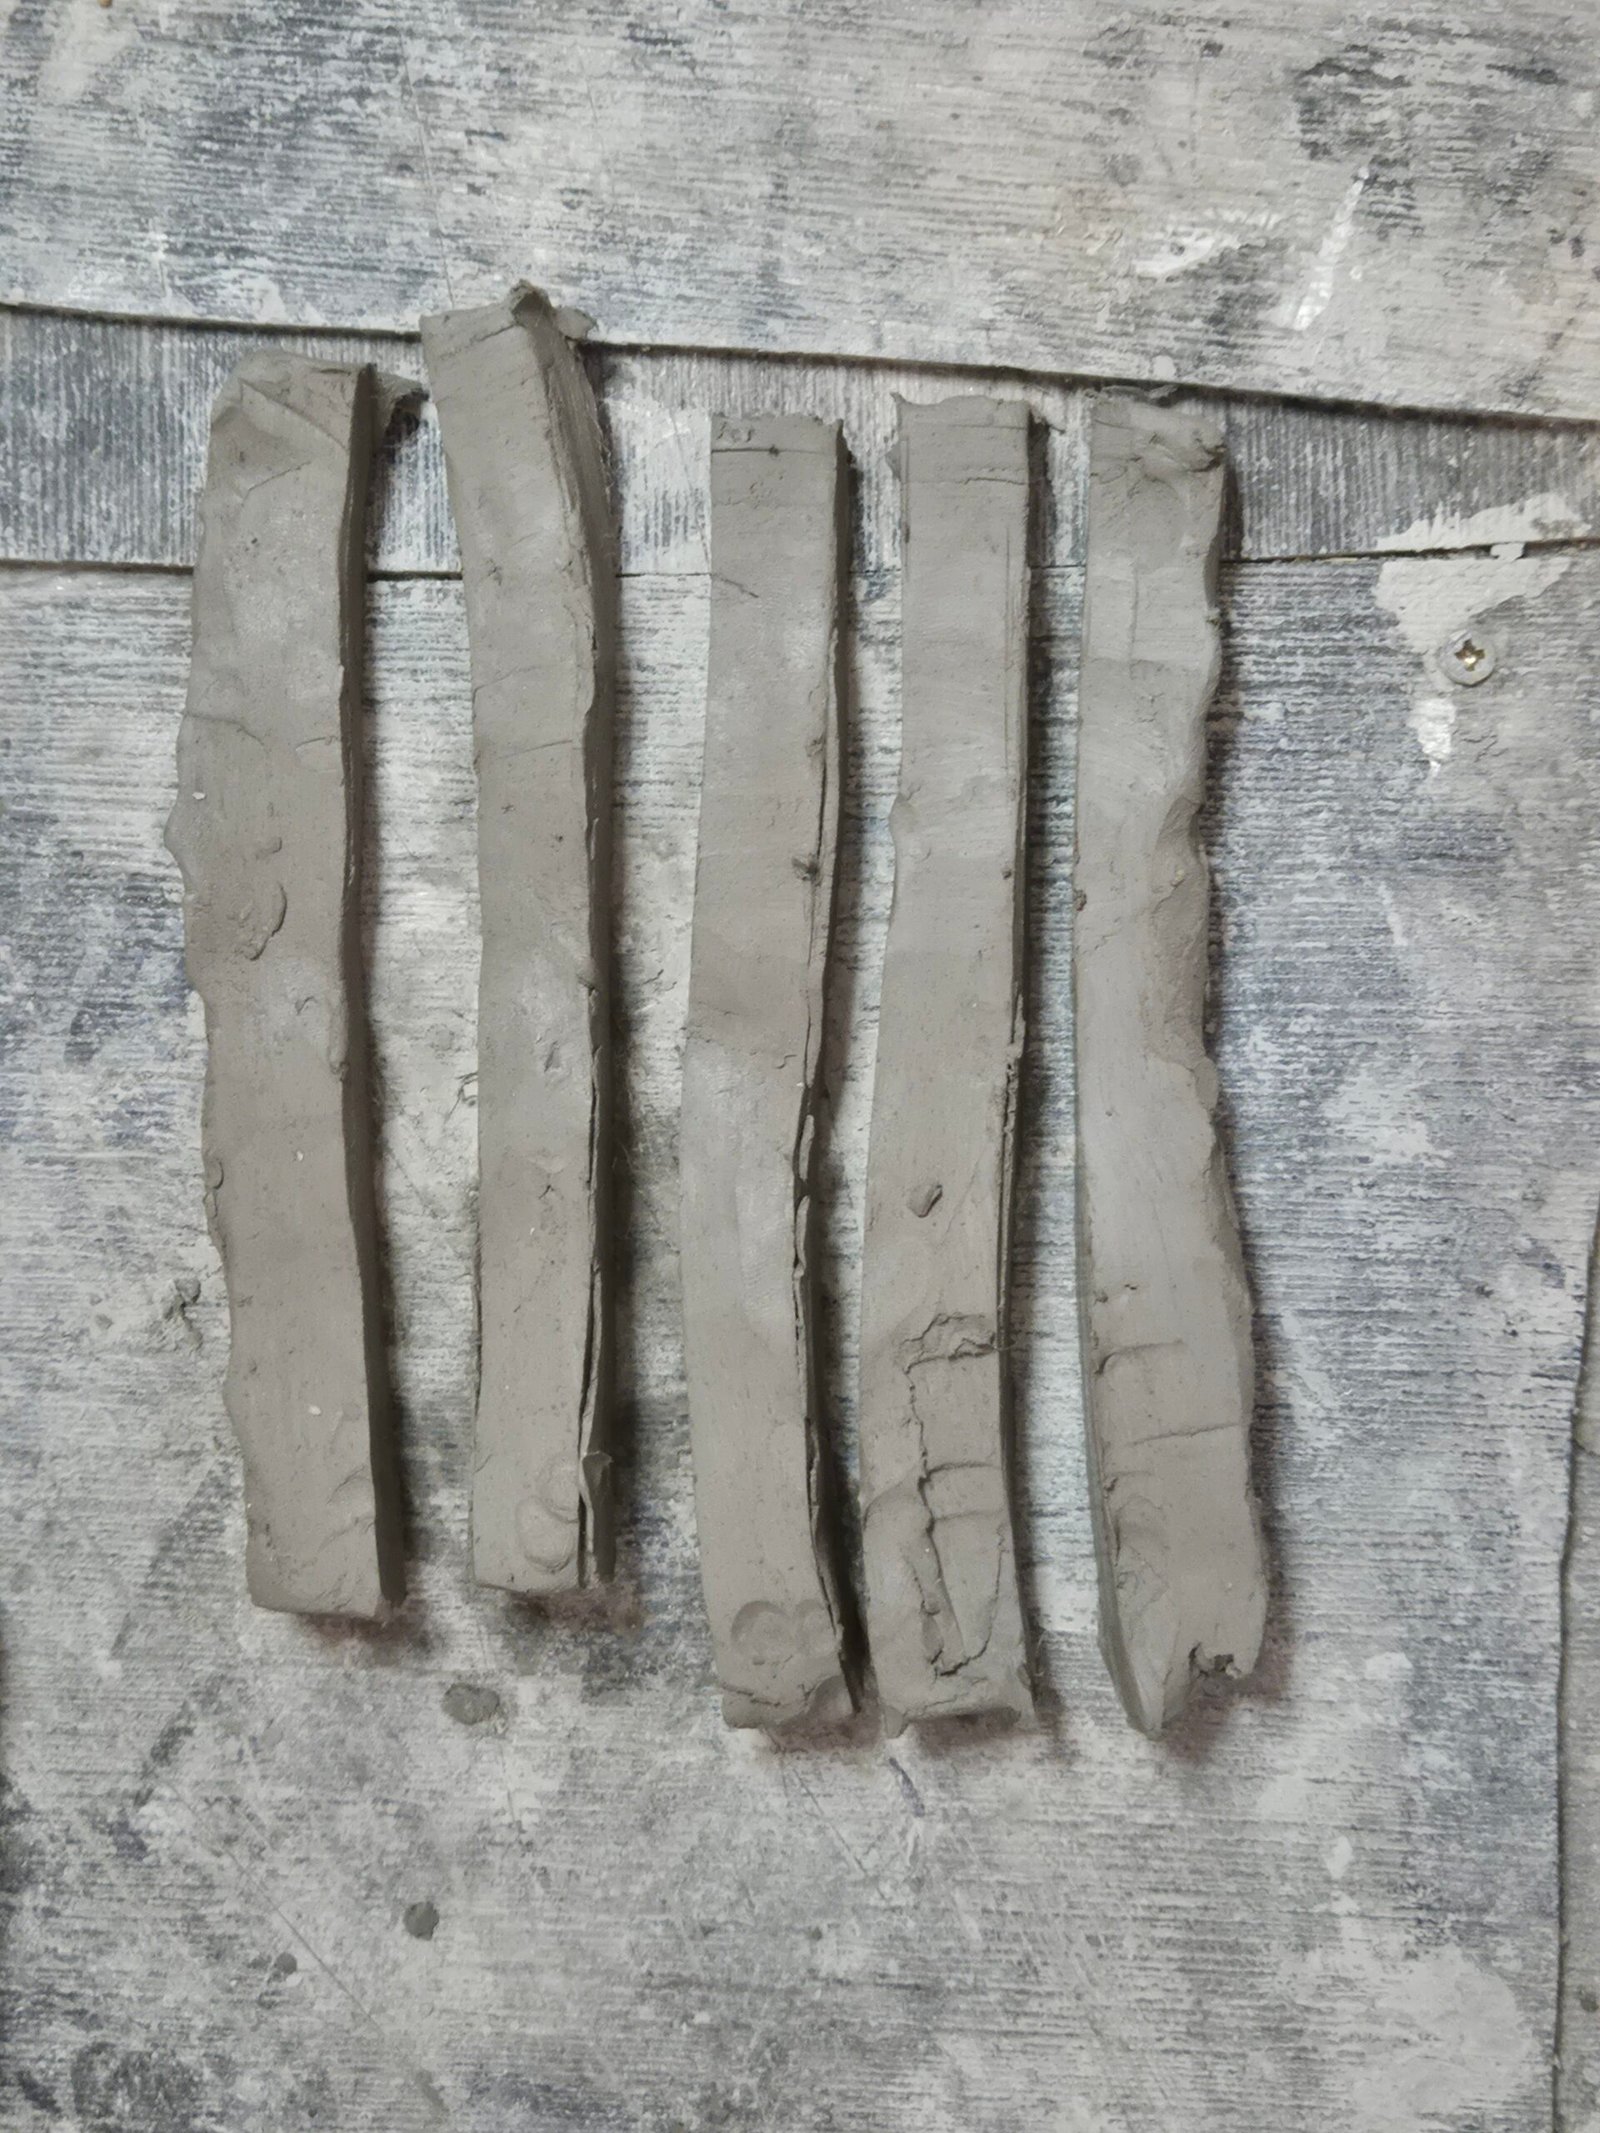
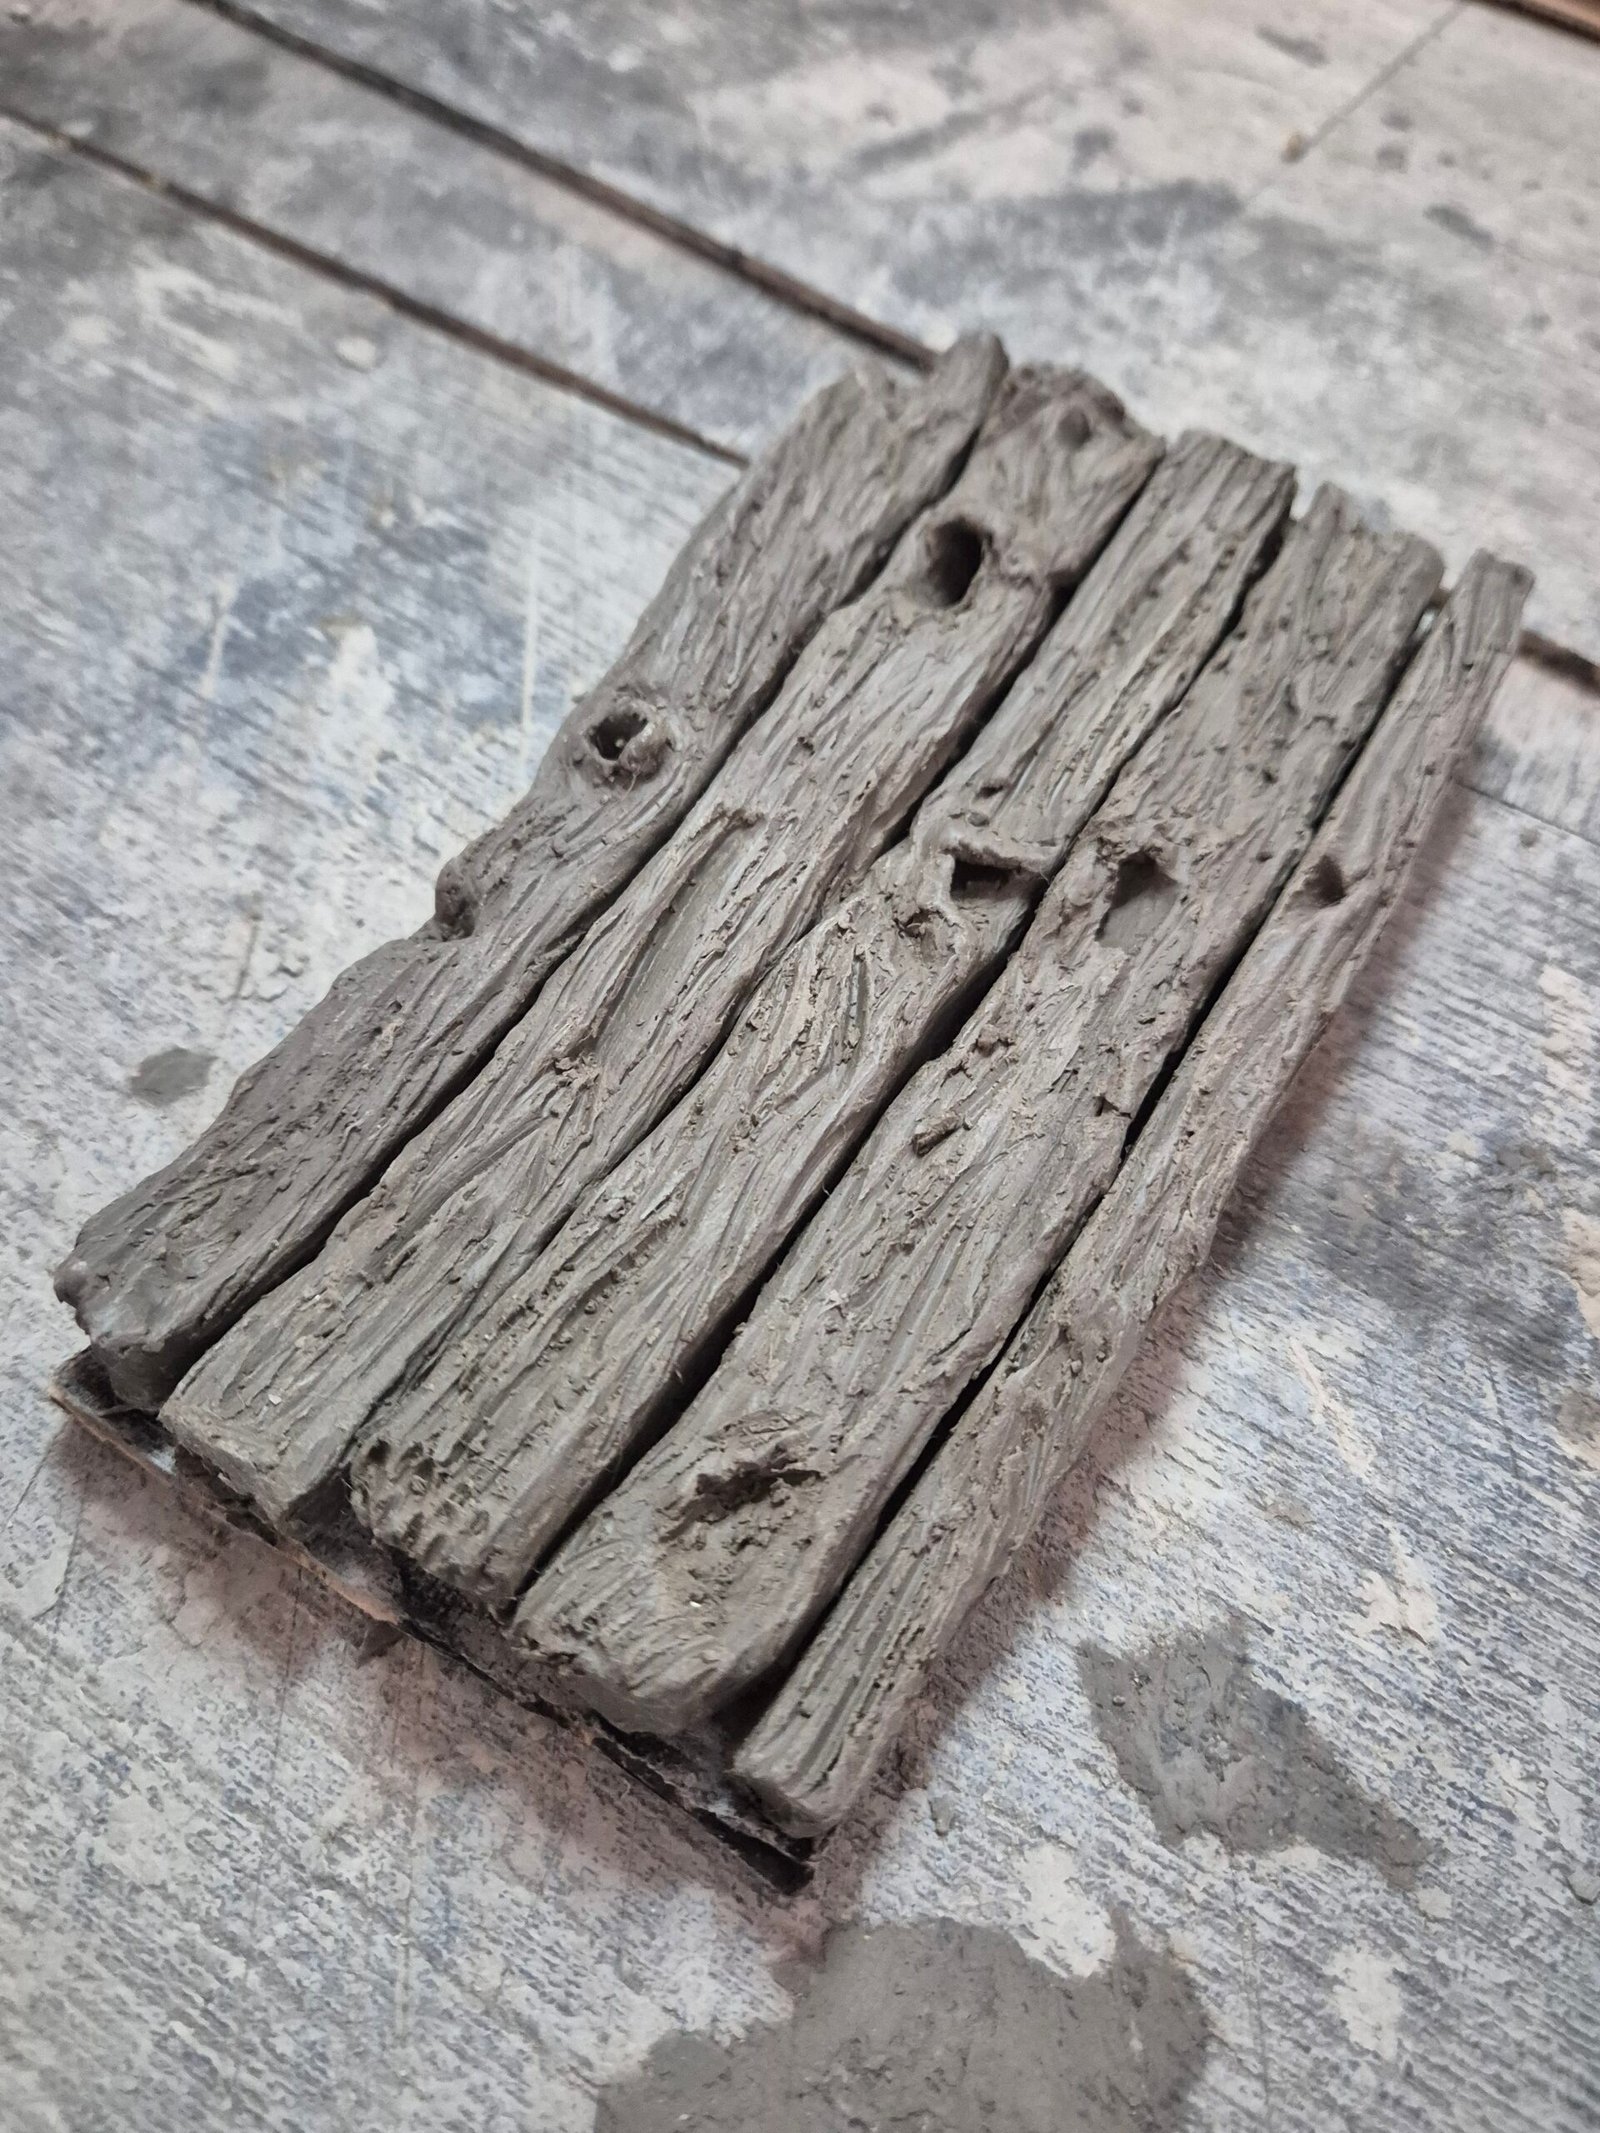
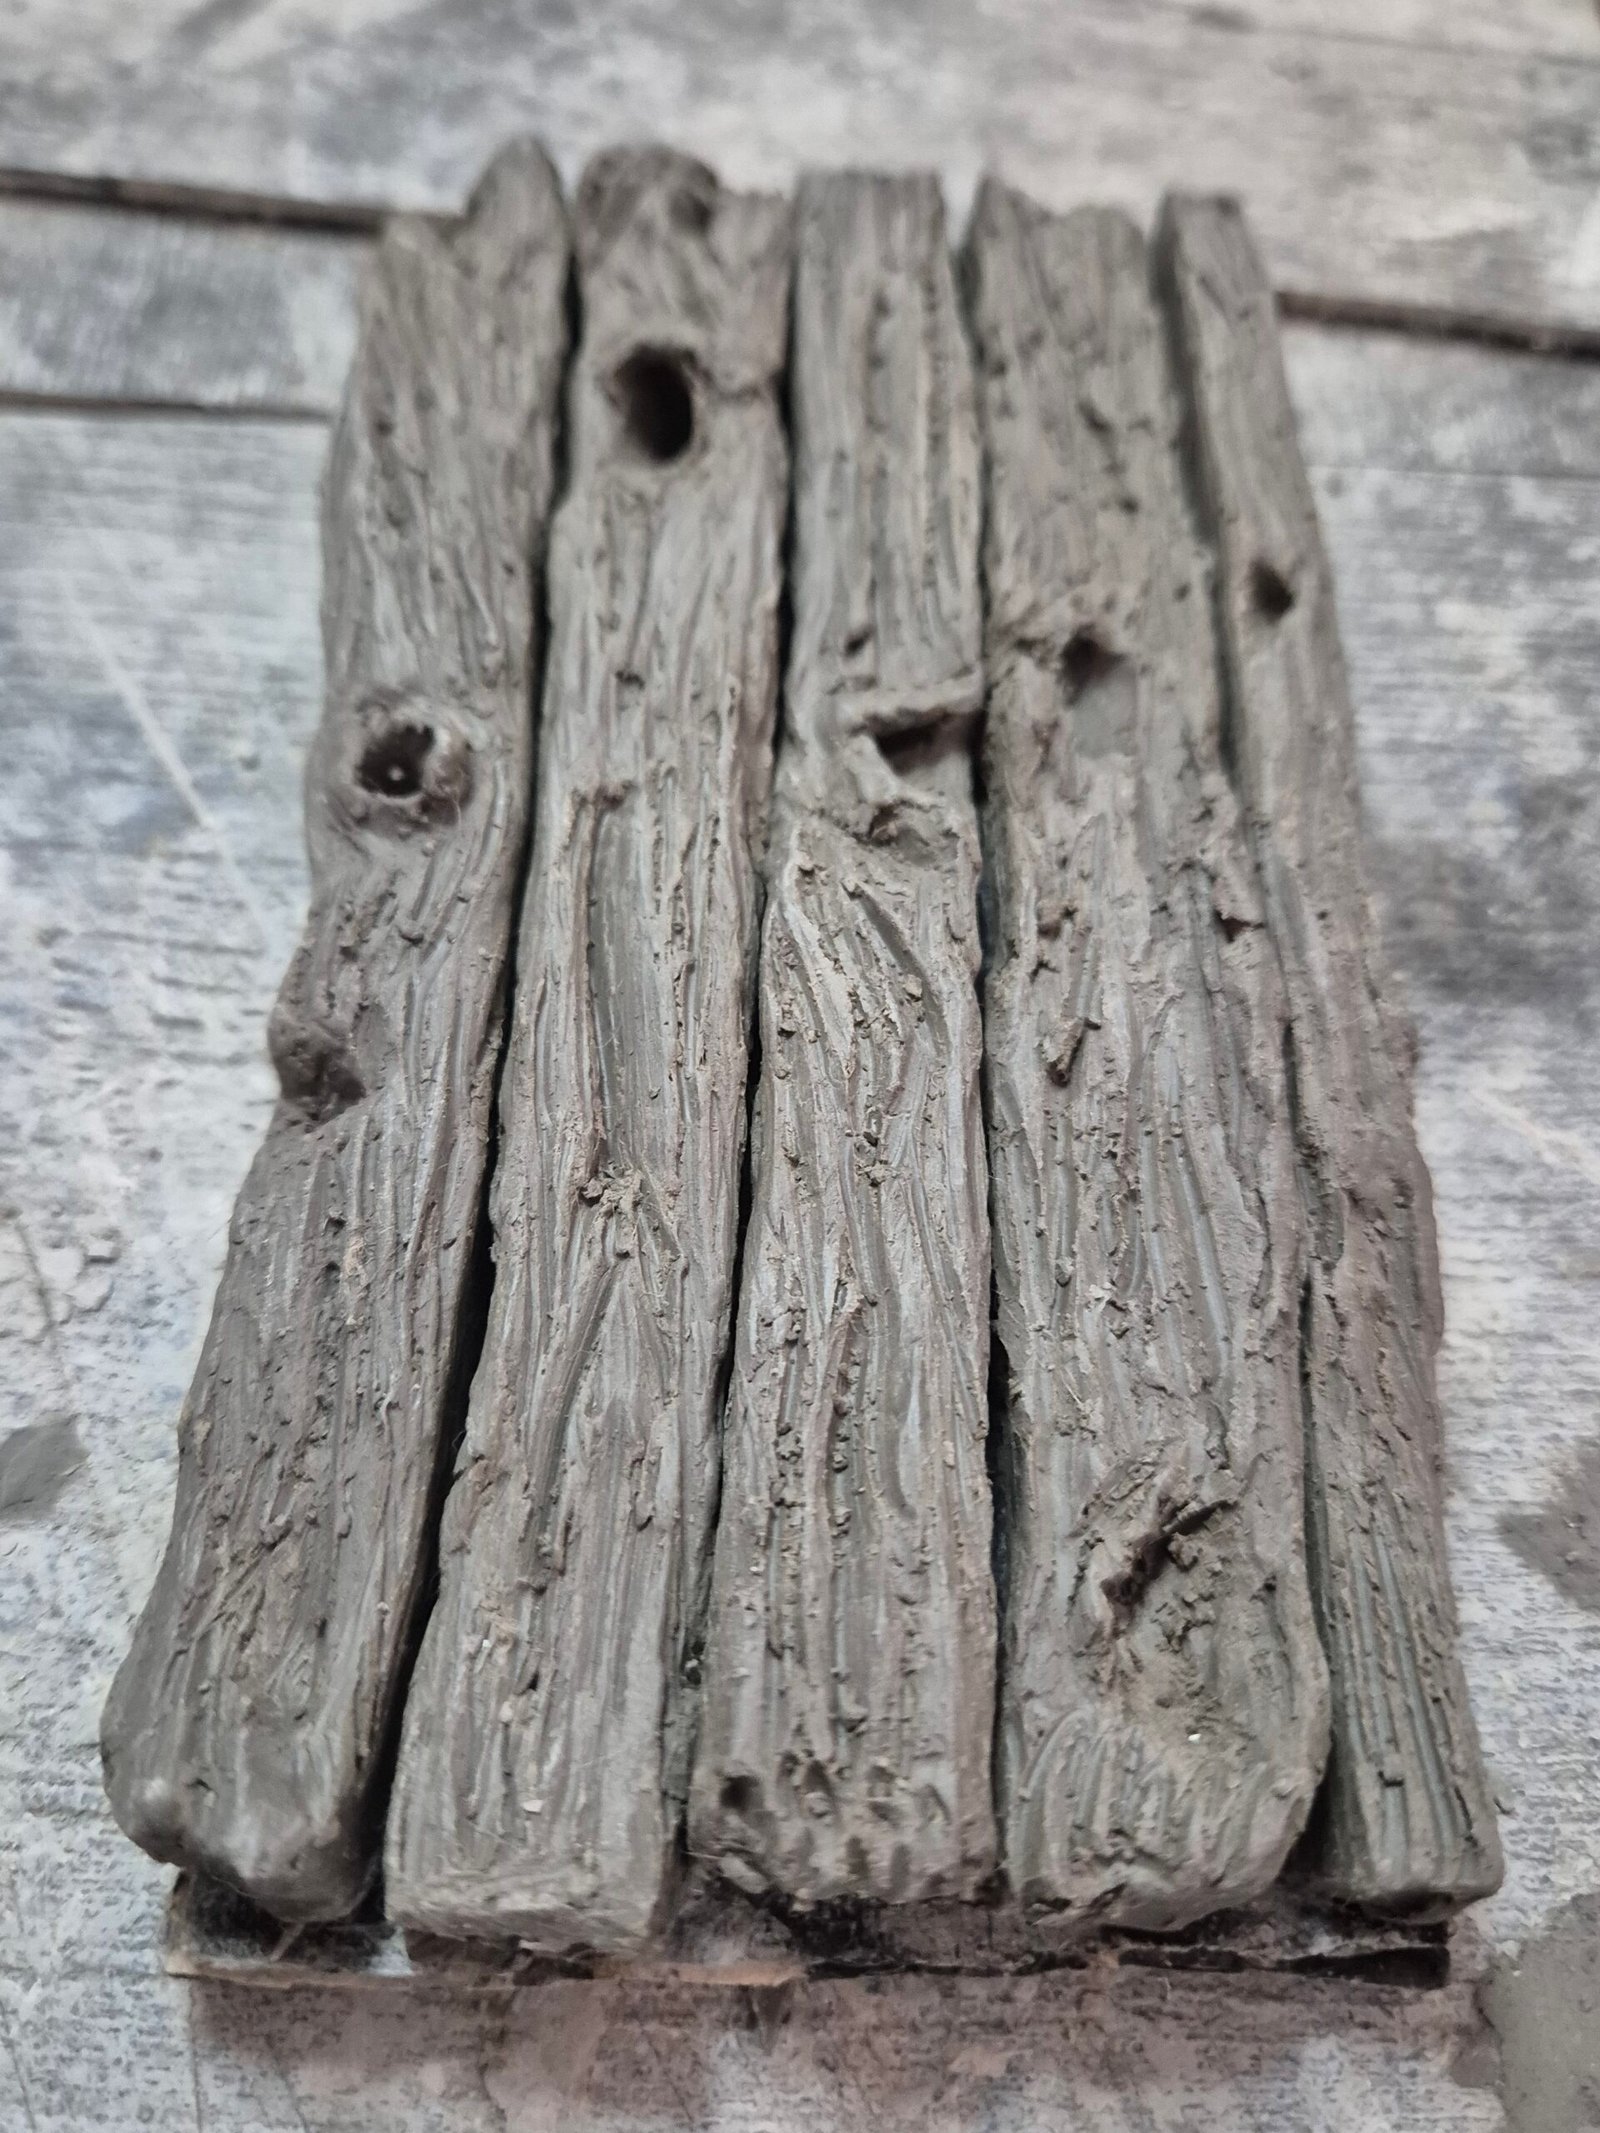
Rather than carving wood planks into one solid piece, I decided to cut the door into five separate planks. This helps create natural gaps between each board and gives the finished door a much more realistic appearance.
Once the planks were cut, I gently added slight bevels along the edges to help define each piece of timber.
At this stage I keep everything fairly simple. The clay is still very soft and fragile, so only the overall shape and structure are needed. Any fine details added now would simply be damaged while handling the model. Those details come later.
Forming the Wood Texture
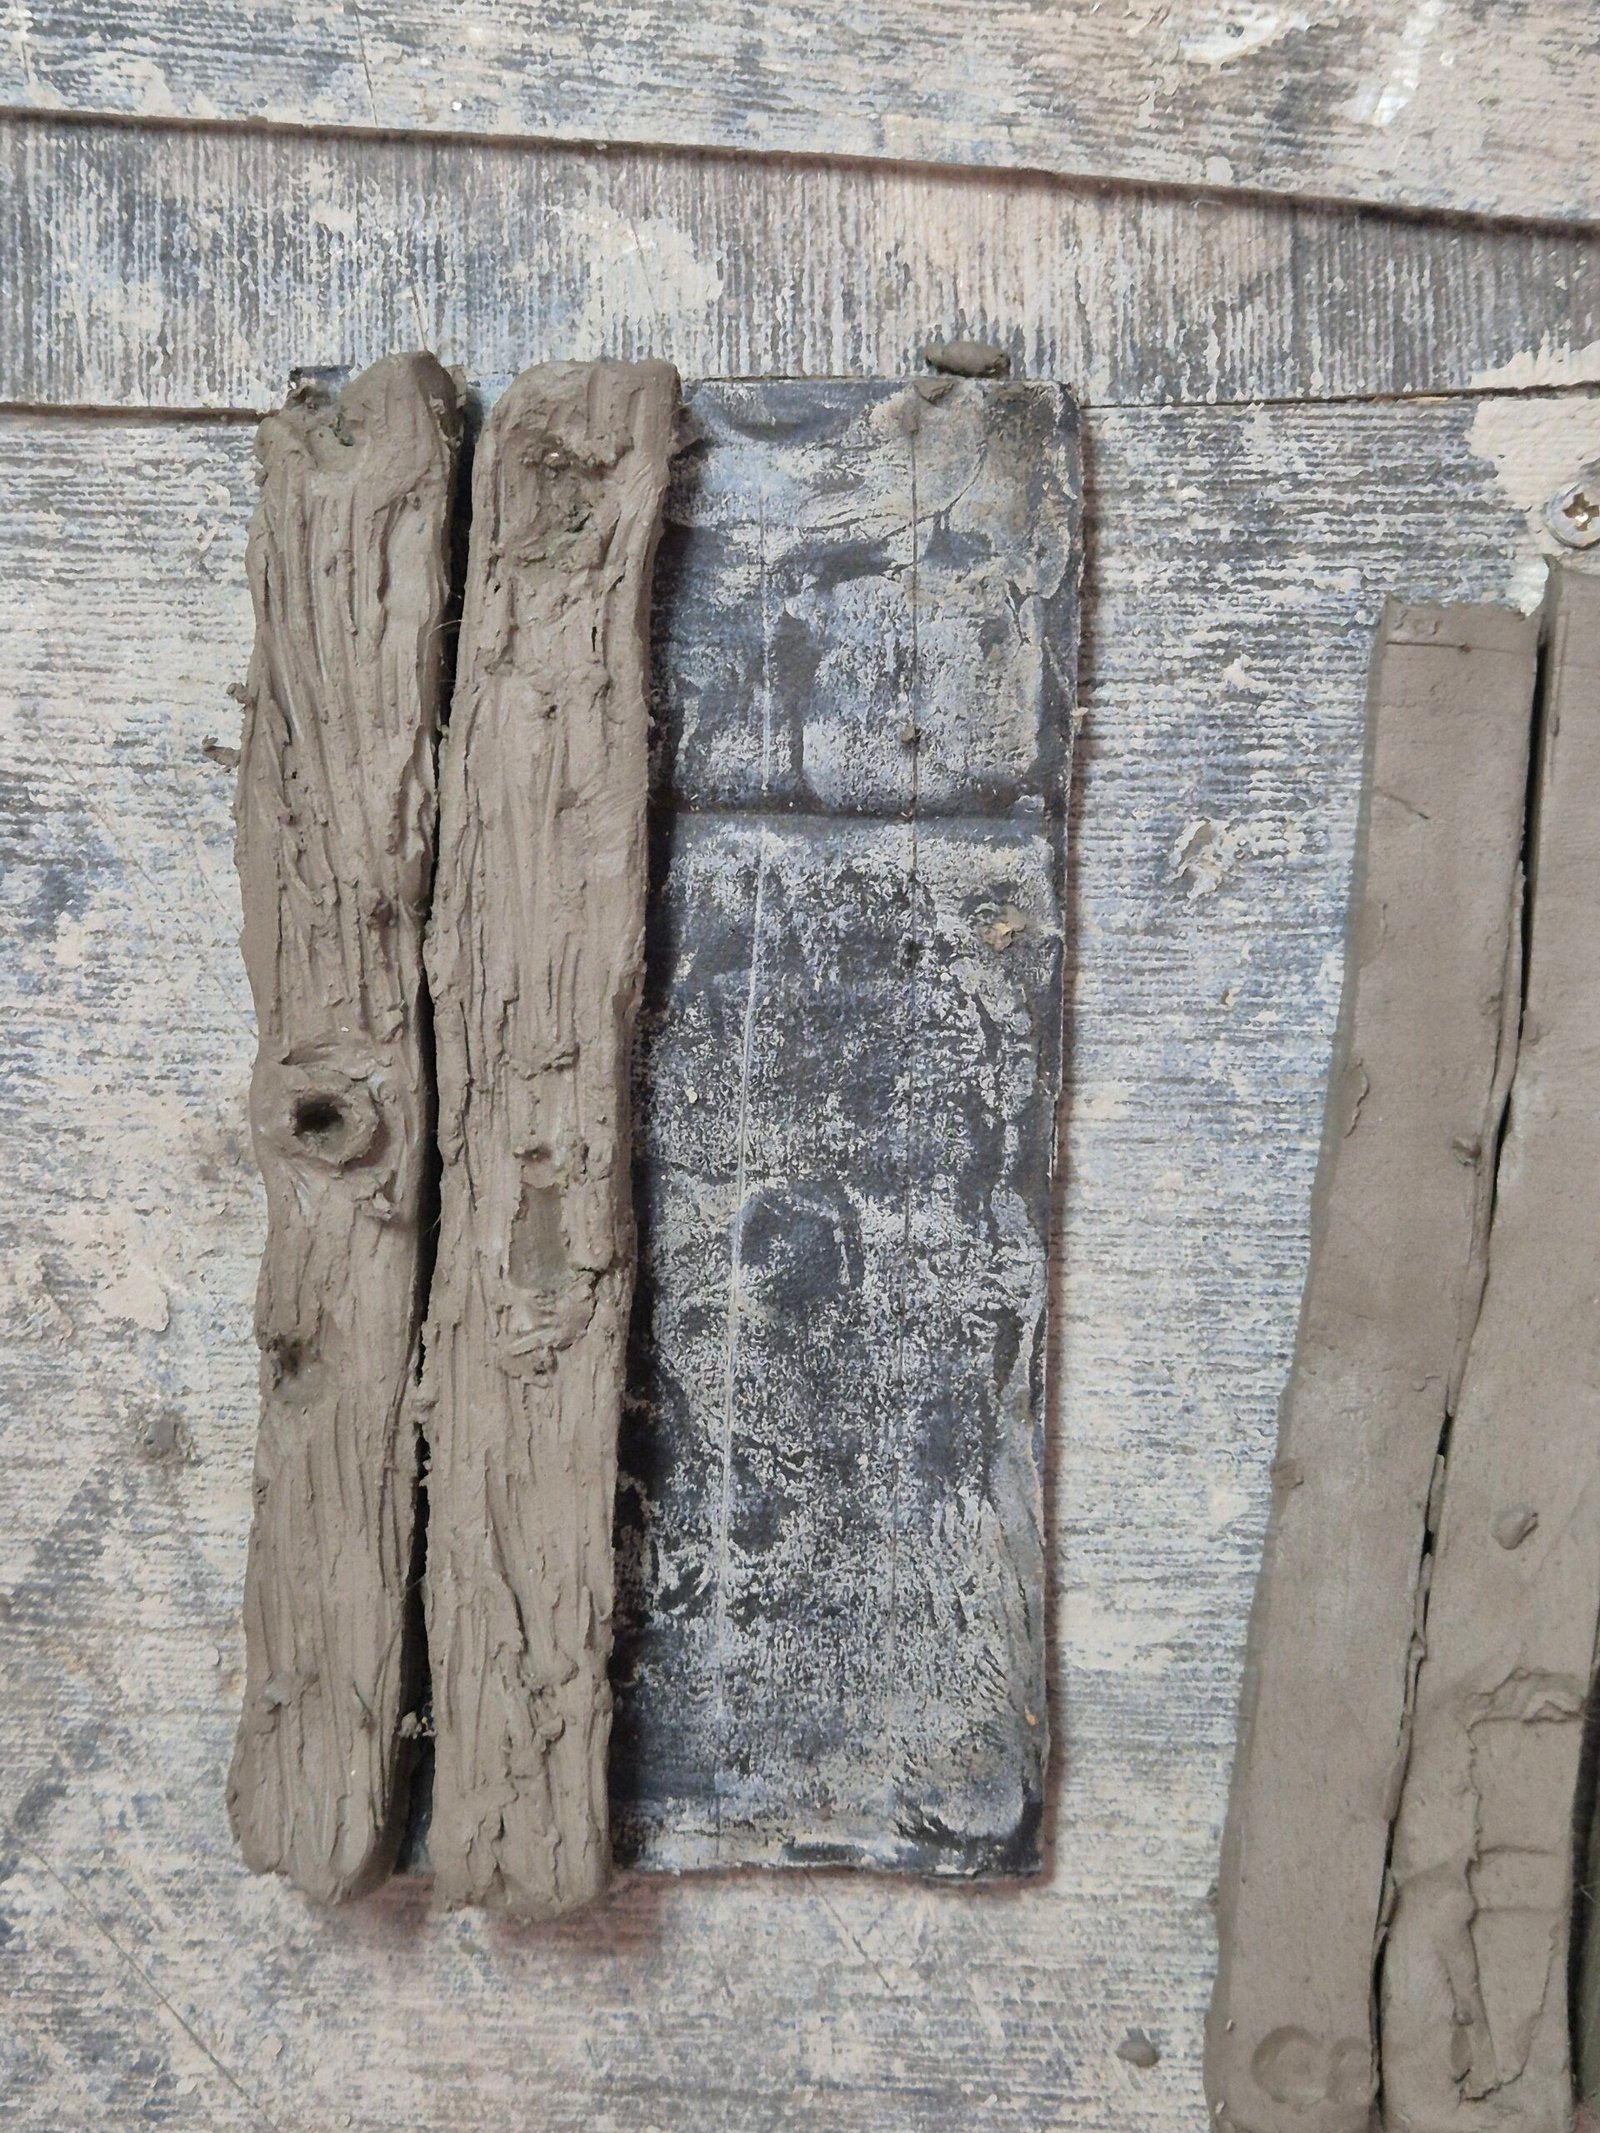
Once the basic shape of the door was complete and the planks had been cut, I left the clay to dry for around 12 to 14 hours.
By this point the surface had become firm enough to hold detail while the inside was still soft enough to carve into. This is the perfect stage for adding the wood grain.
The semi hardened surface makes it much easier to create deeper textures without accidentally squashing or deforming the entire door.
Adding the Wood Details
Once the clay had reached the right stage of drying, I started adding the finer details.
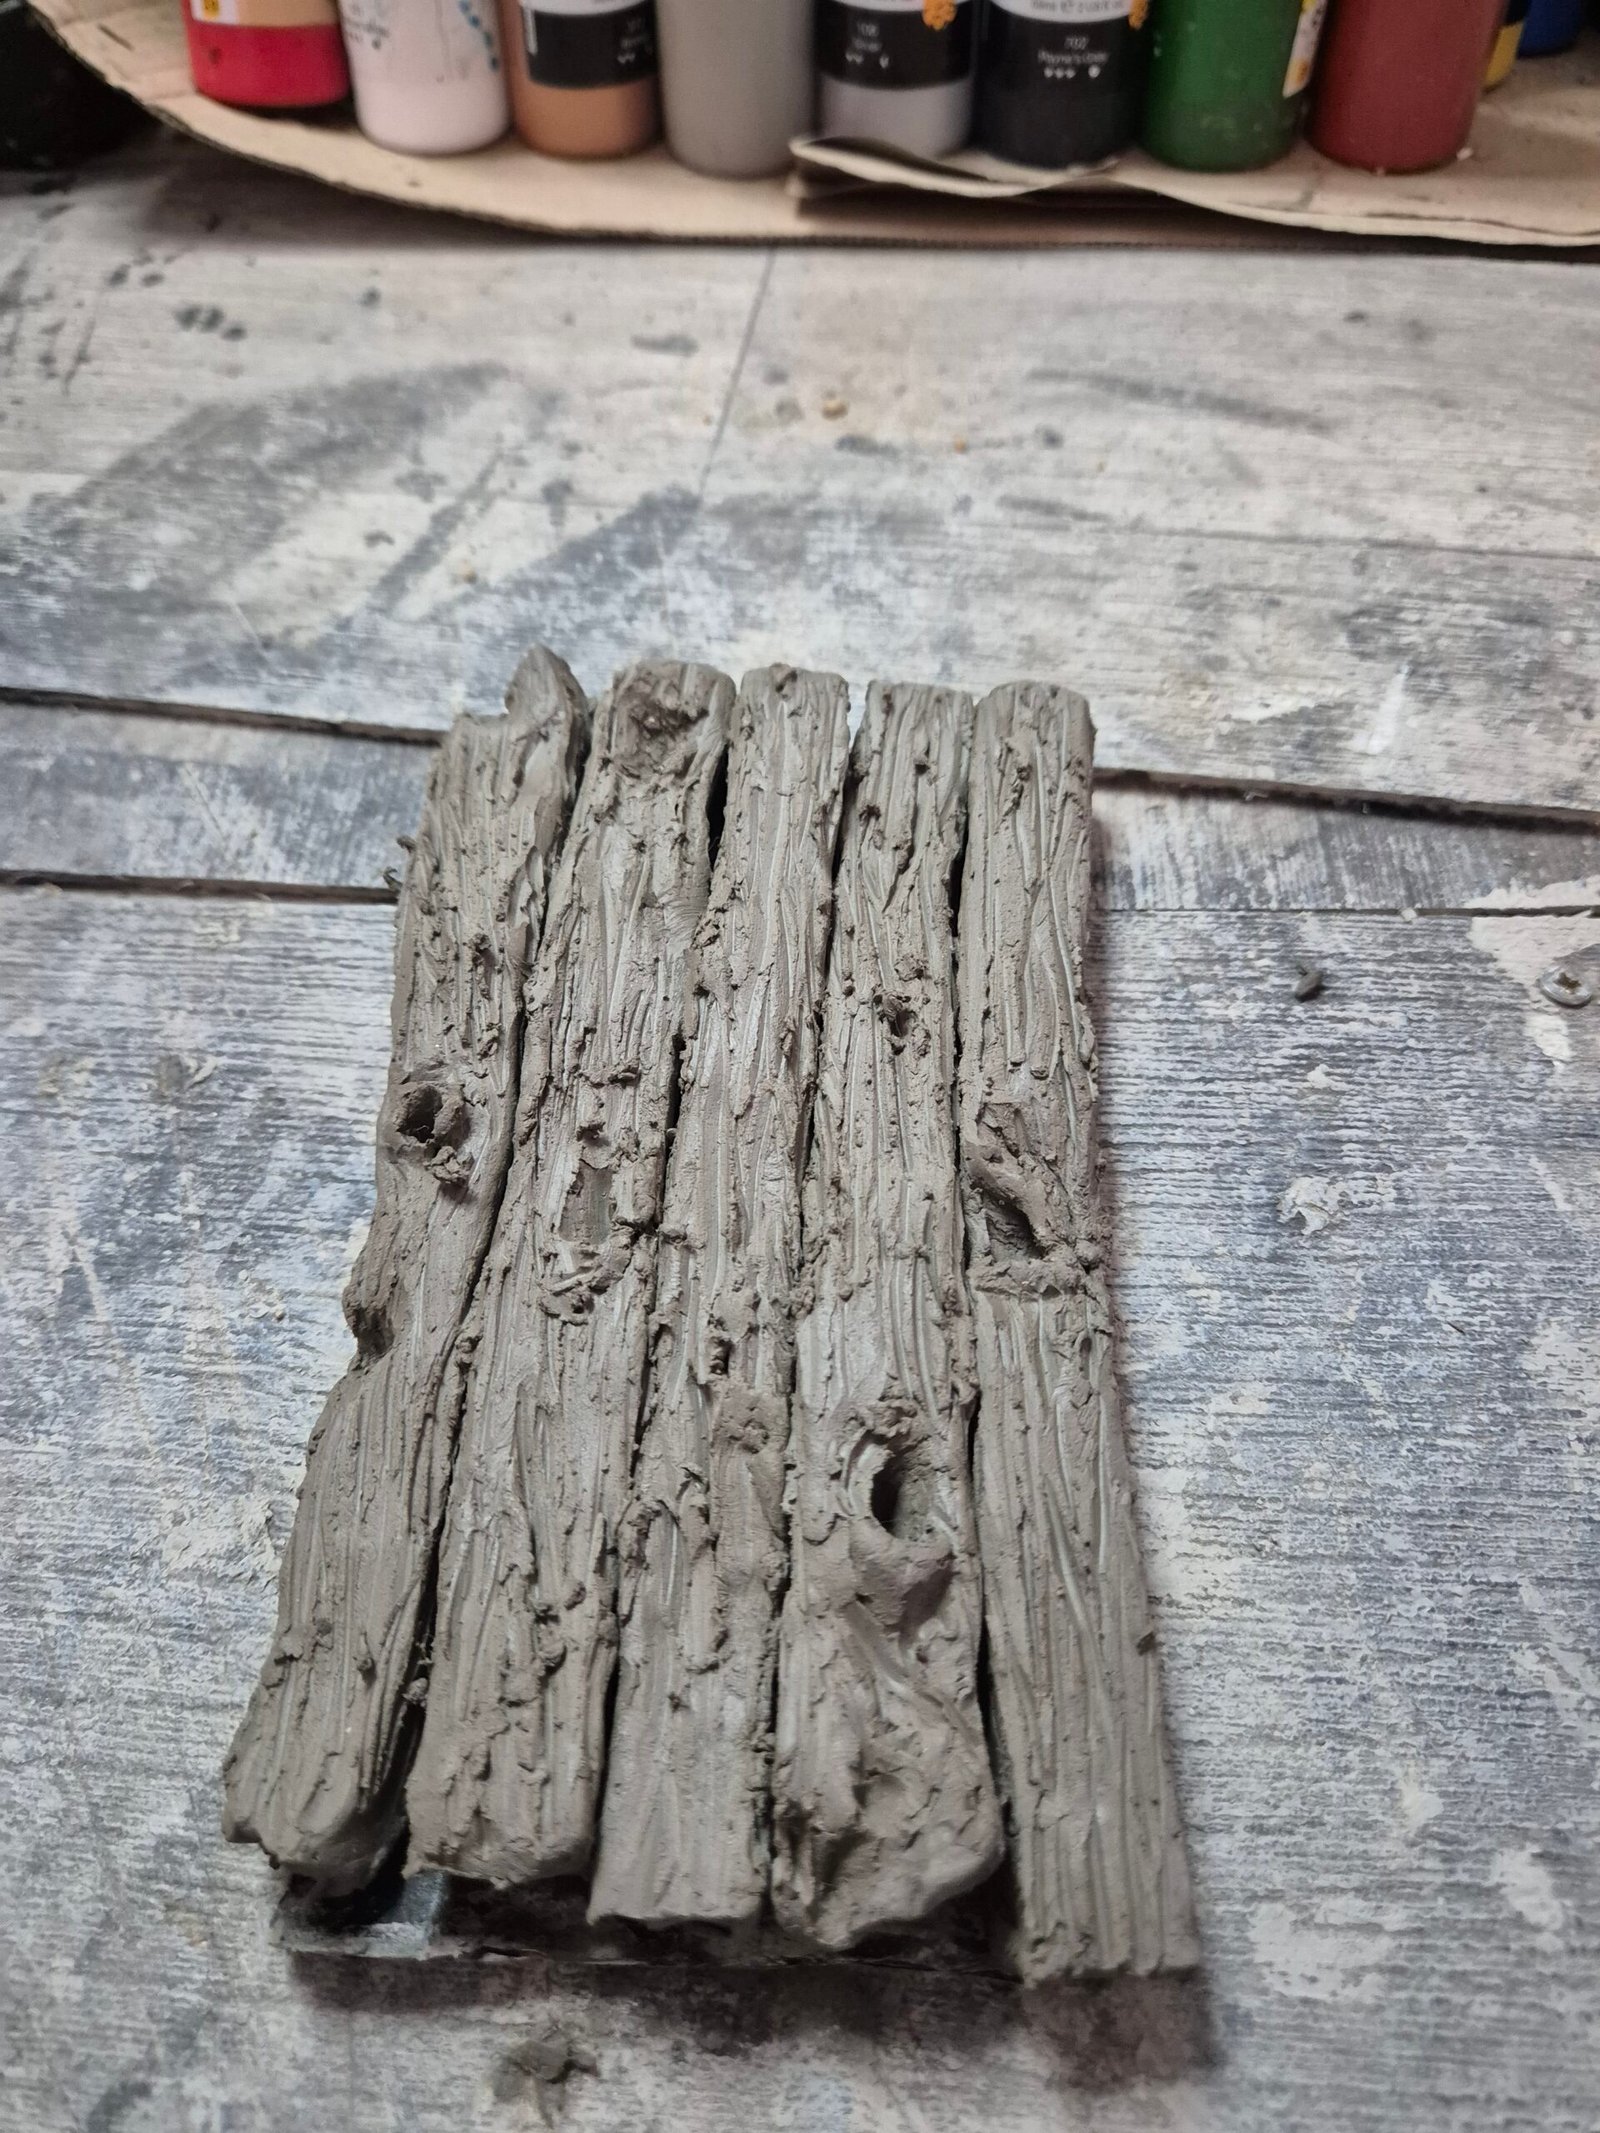
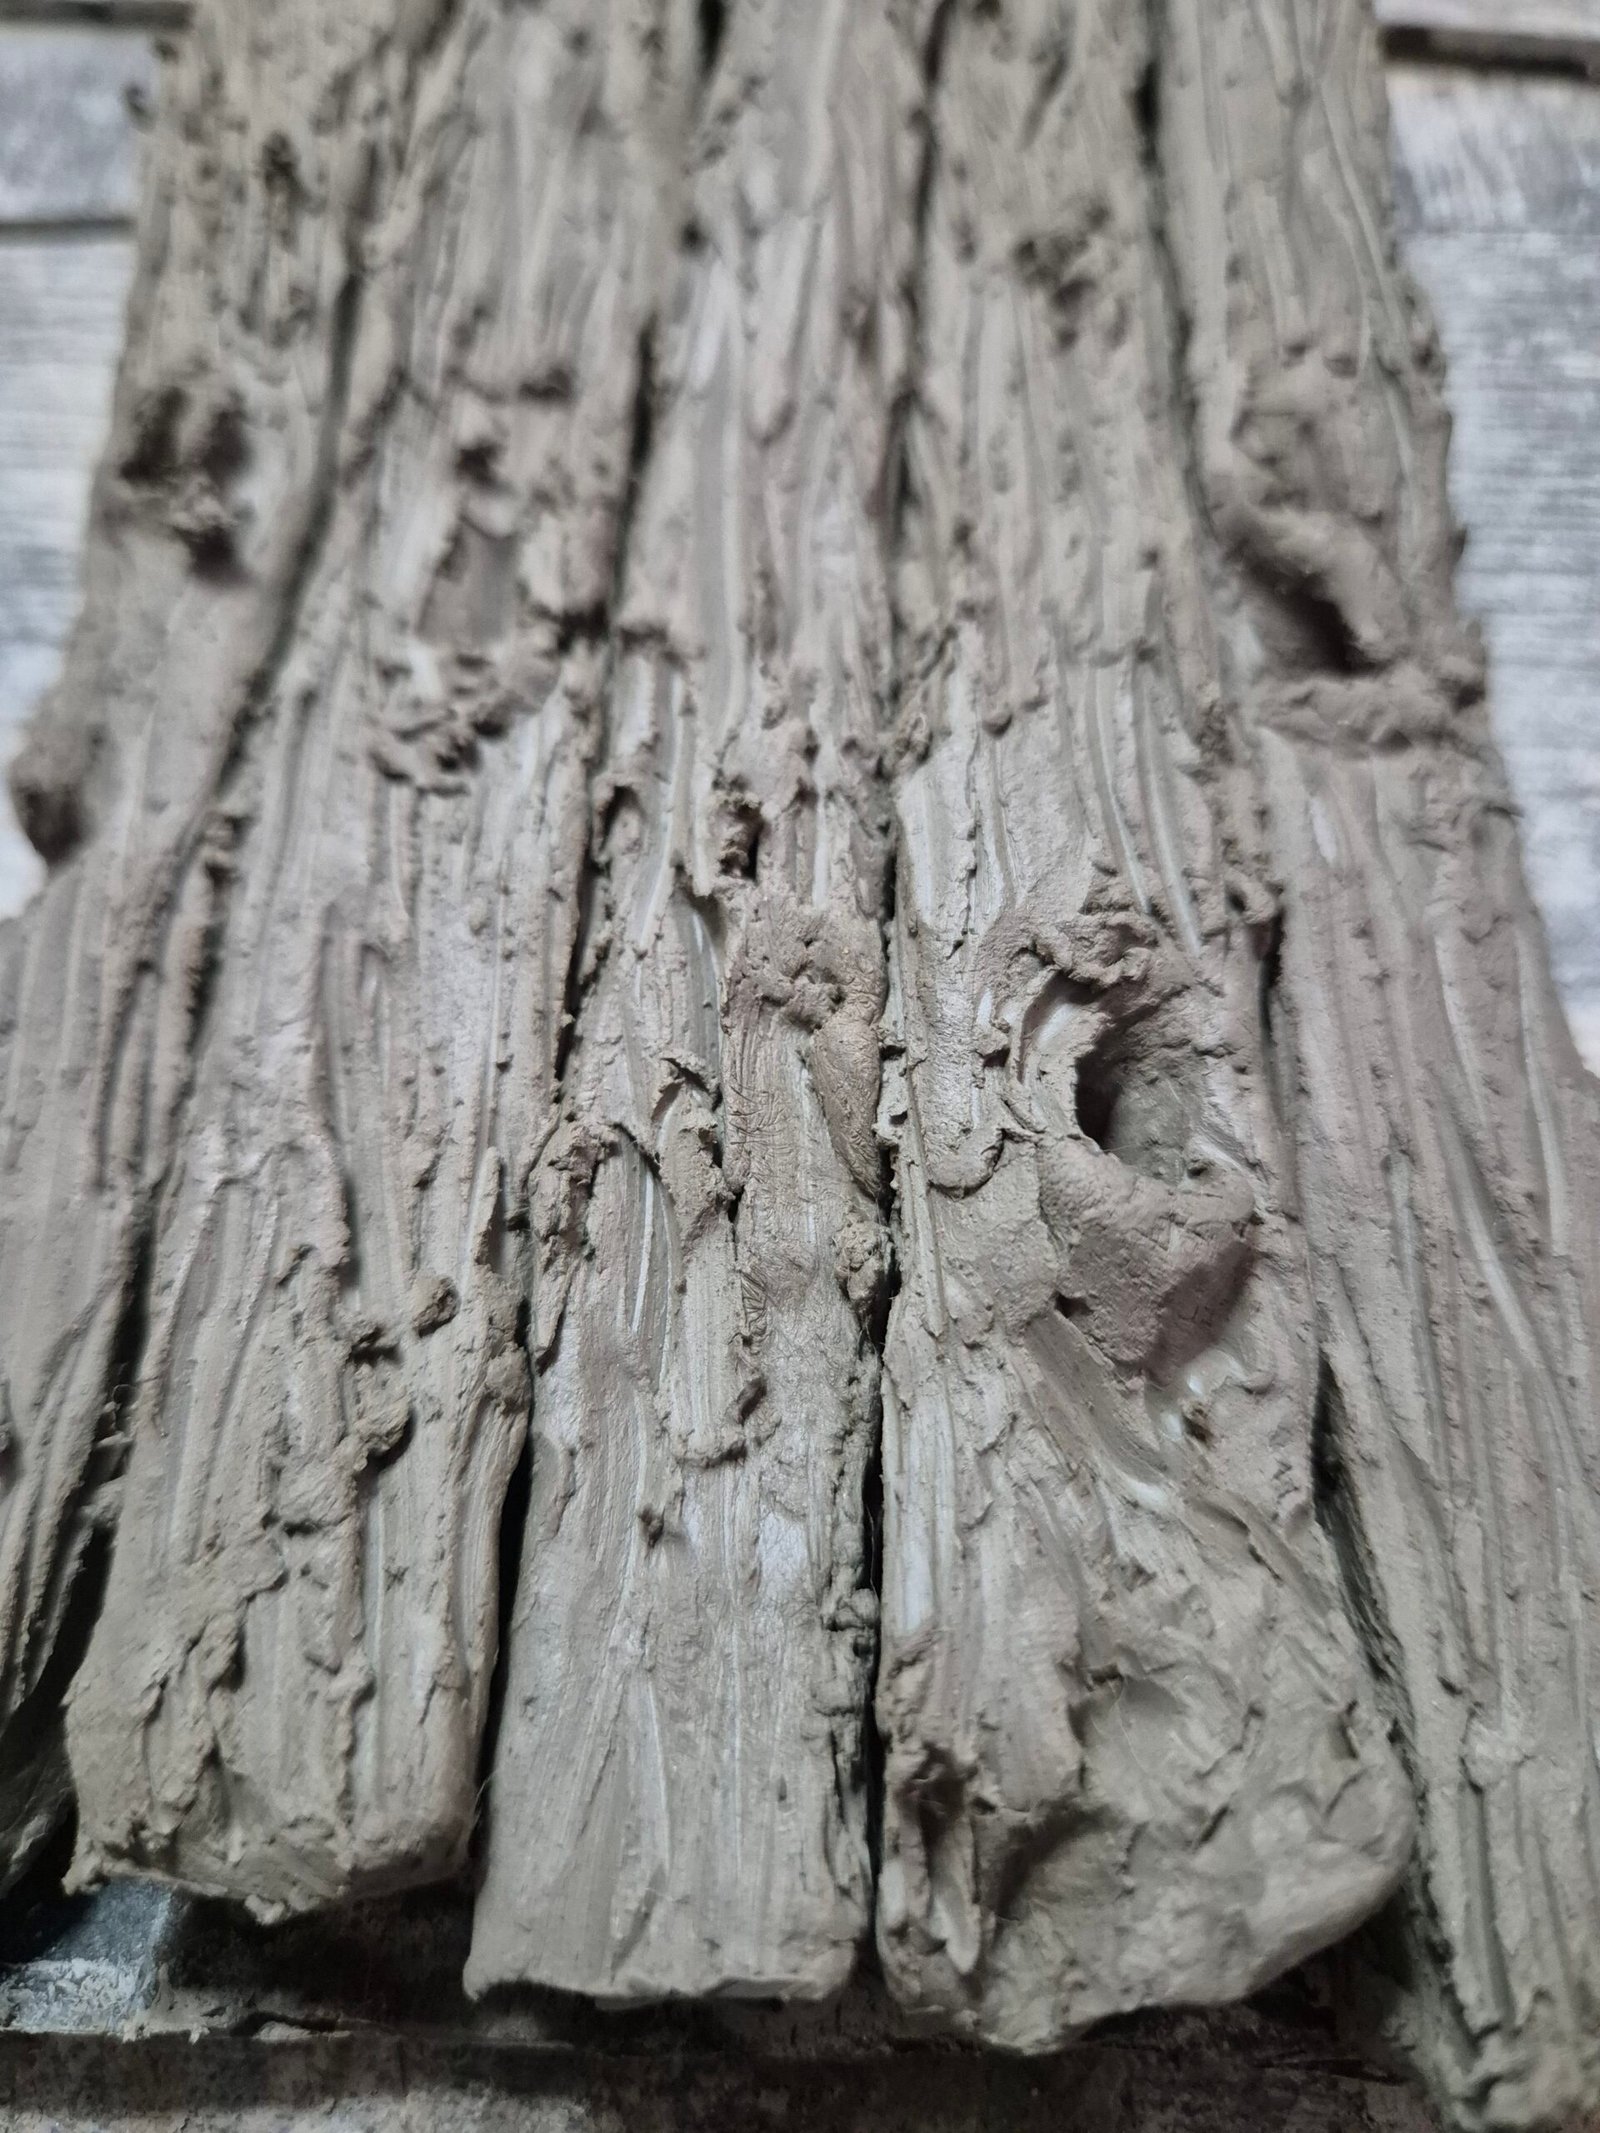
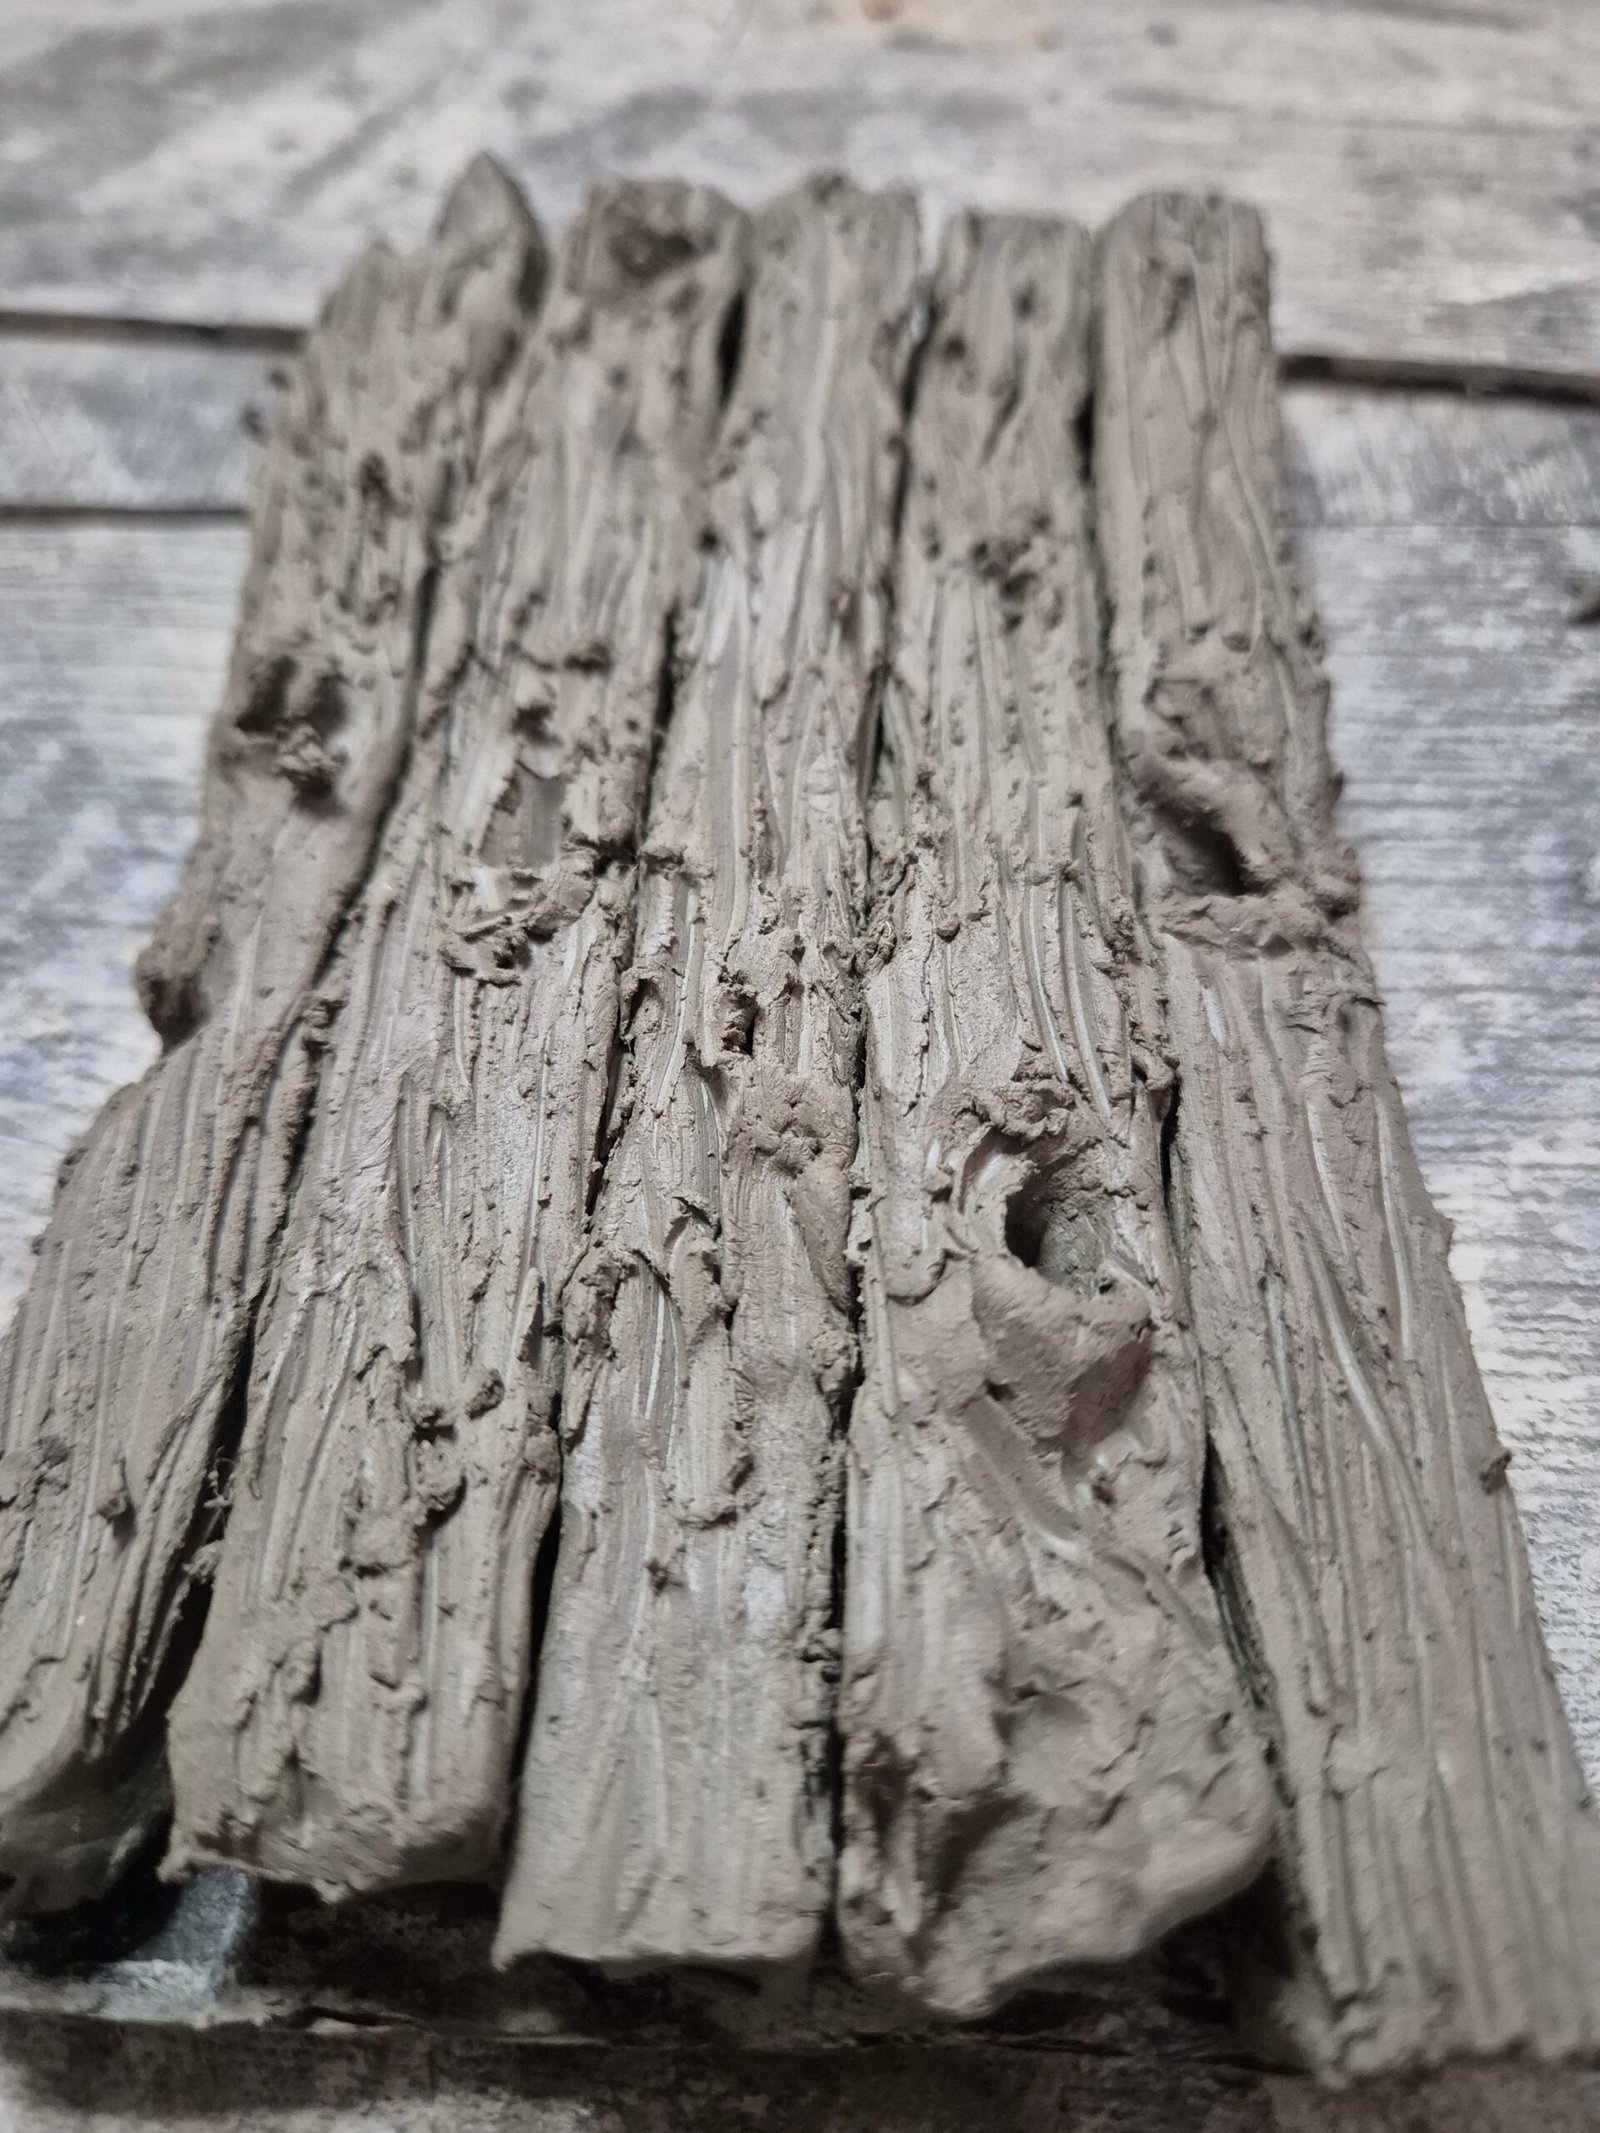
For this I used a homemade sculpting tool made from an old wooden paintbrush with the end cut at an angle. I gently pressed the tool into the clay, carving random curved lines across the surface to imitate the grain of old timber.
I like creating quite rough bark textures on my wooden models, as you can see in the images. It gives the wood a much older and weathered appearance.
Once I was happy with the texture, I lightly went over the sharp edges using a slightly damp paintbrush. This softens the harsh cuts and blends everything together, giving the wood a much more natural and organic look.
To make the wood look even older, I added tree knots, warped areas and uneven surfaces. The idea is that this door has been part of the blacksmith’s workshop for decades, slowly ageing, warping and darkening over the years.
One good and bad thing about air dry clay is that it can sometimes crack as it dries. Rather than seeing this as a problem, I often use these natural cracks to my advantage, incorporating them into the finished model where they make sense.
Final Details
Once the door had fully dried, I went back over the surface and added a few final details.
Small cracks, light grooves and extra texture were carved into the wood to add even more realism. These little finishing touches help break up larger flat areas and make the finished model look much more convincing.
Painting
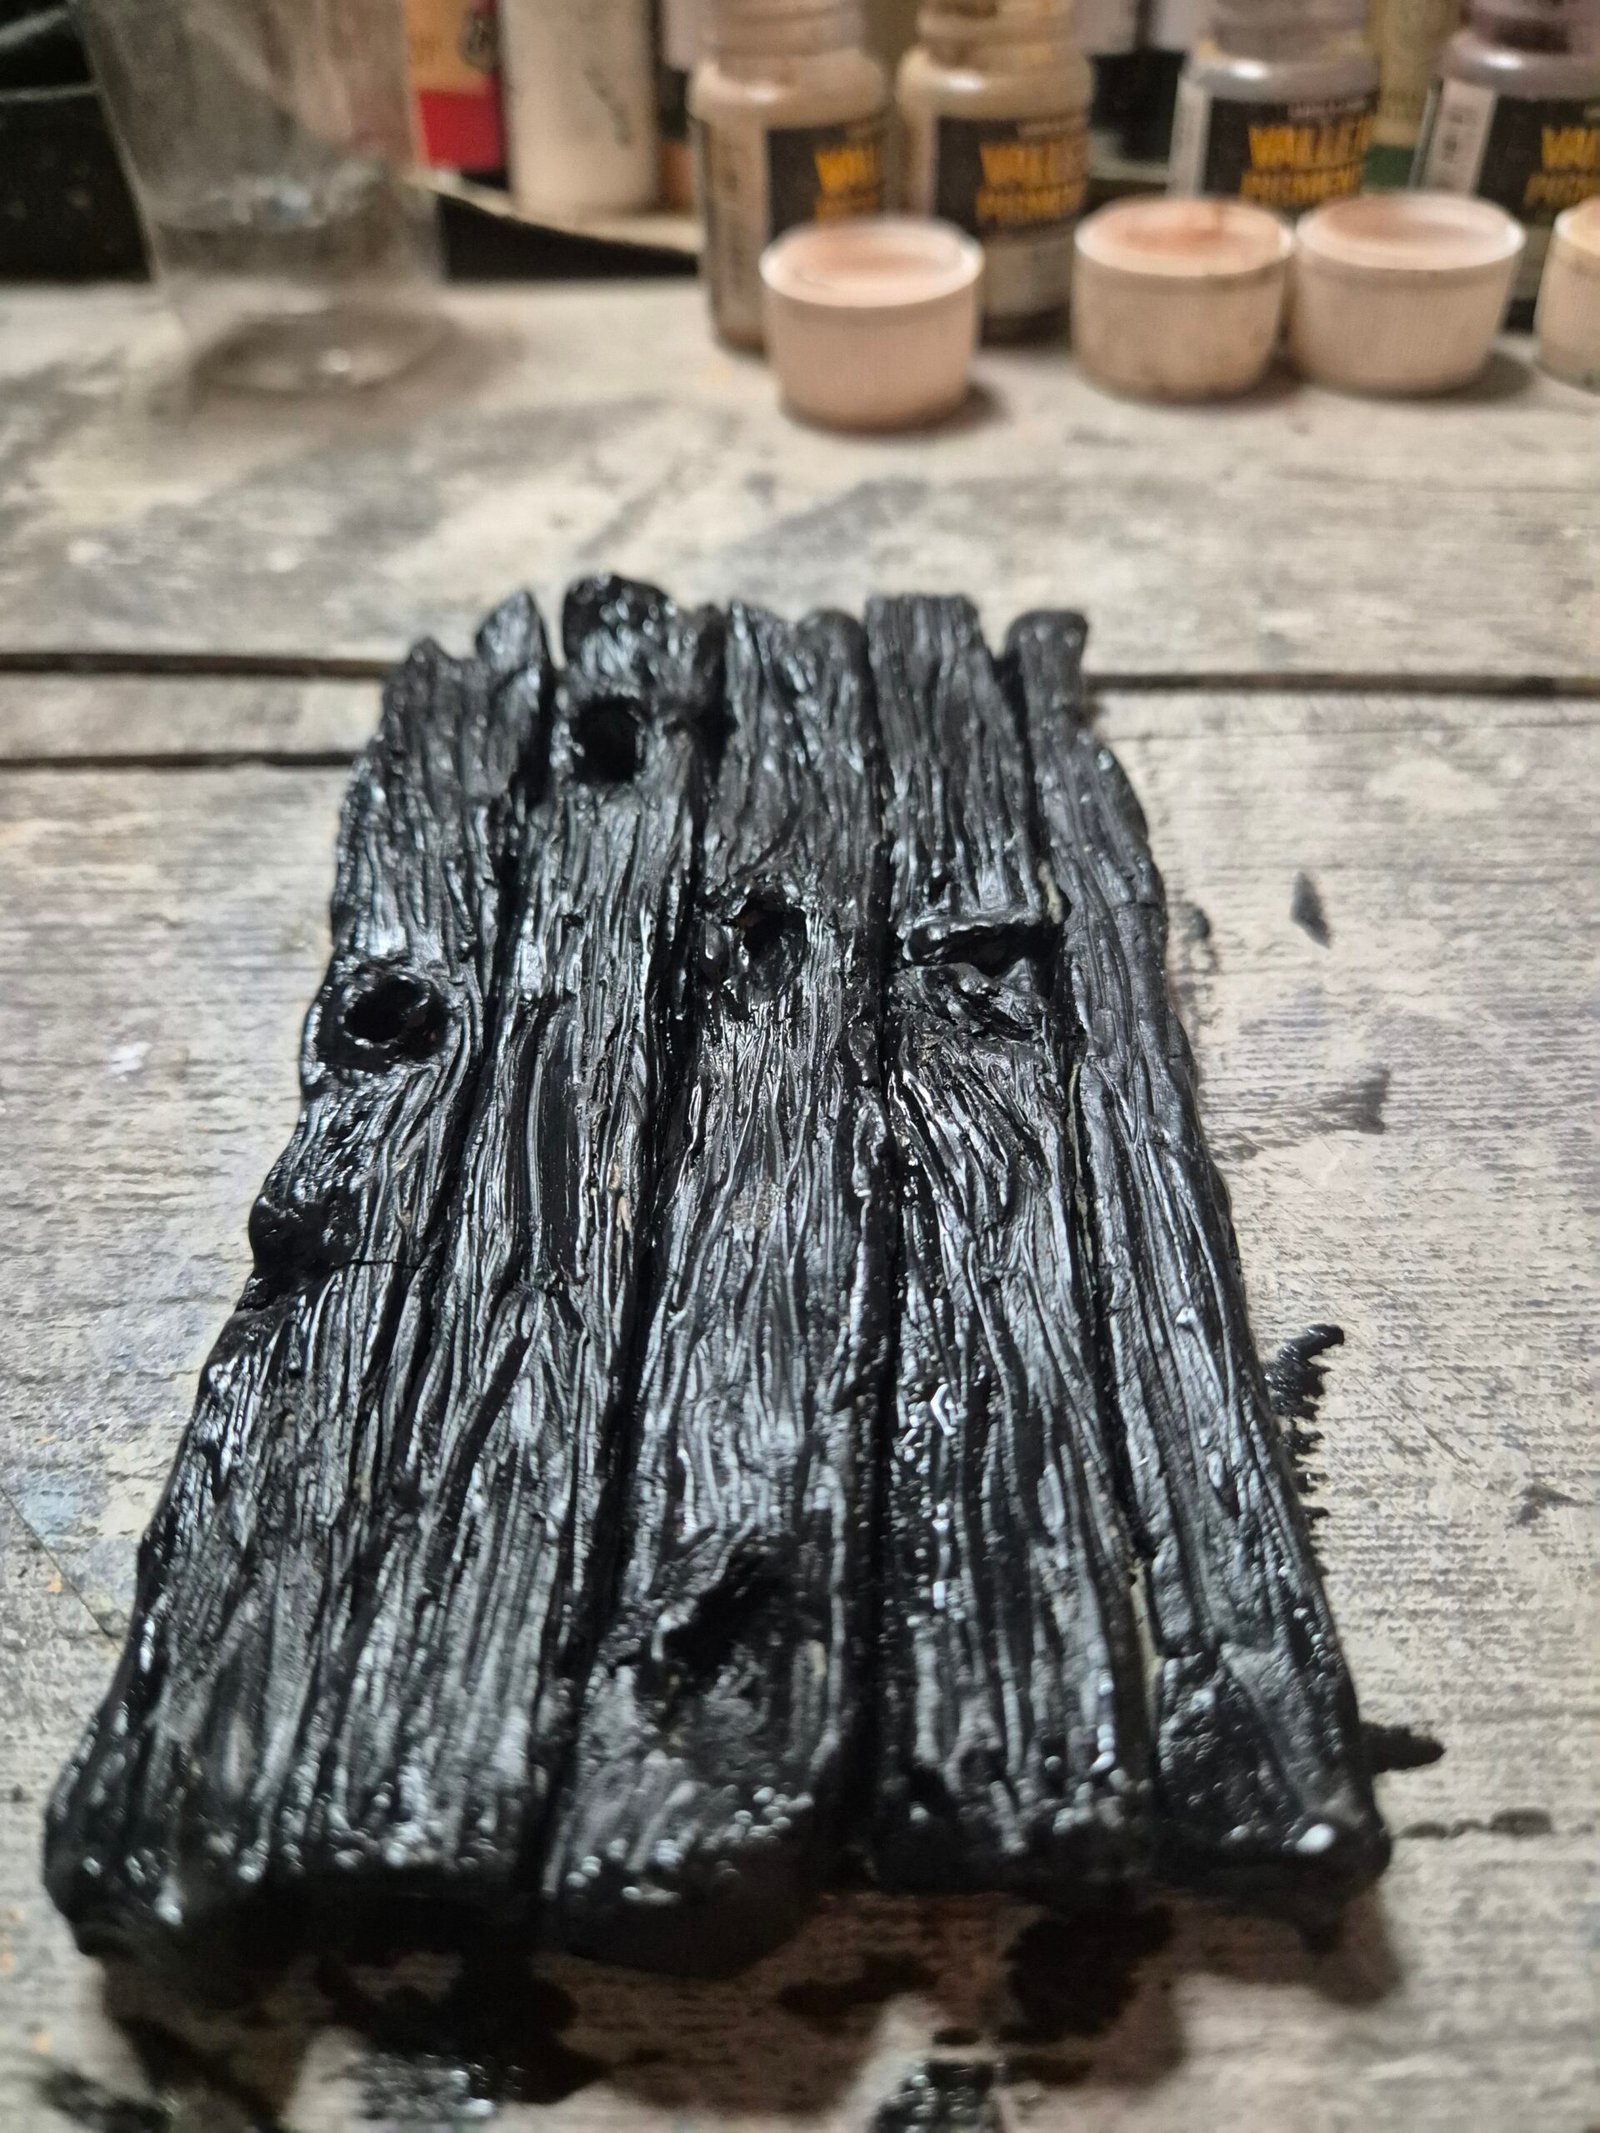
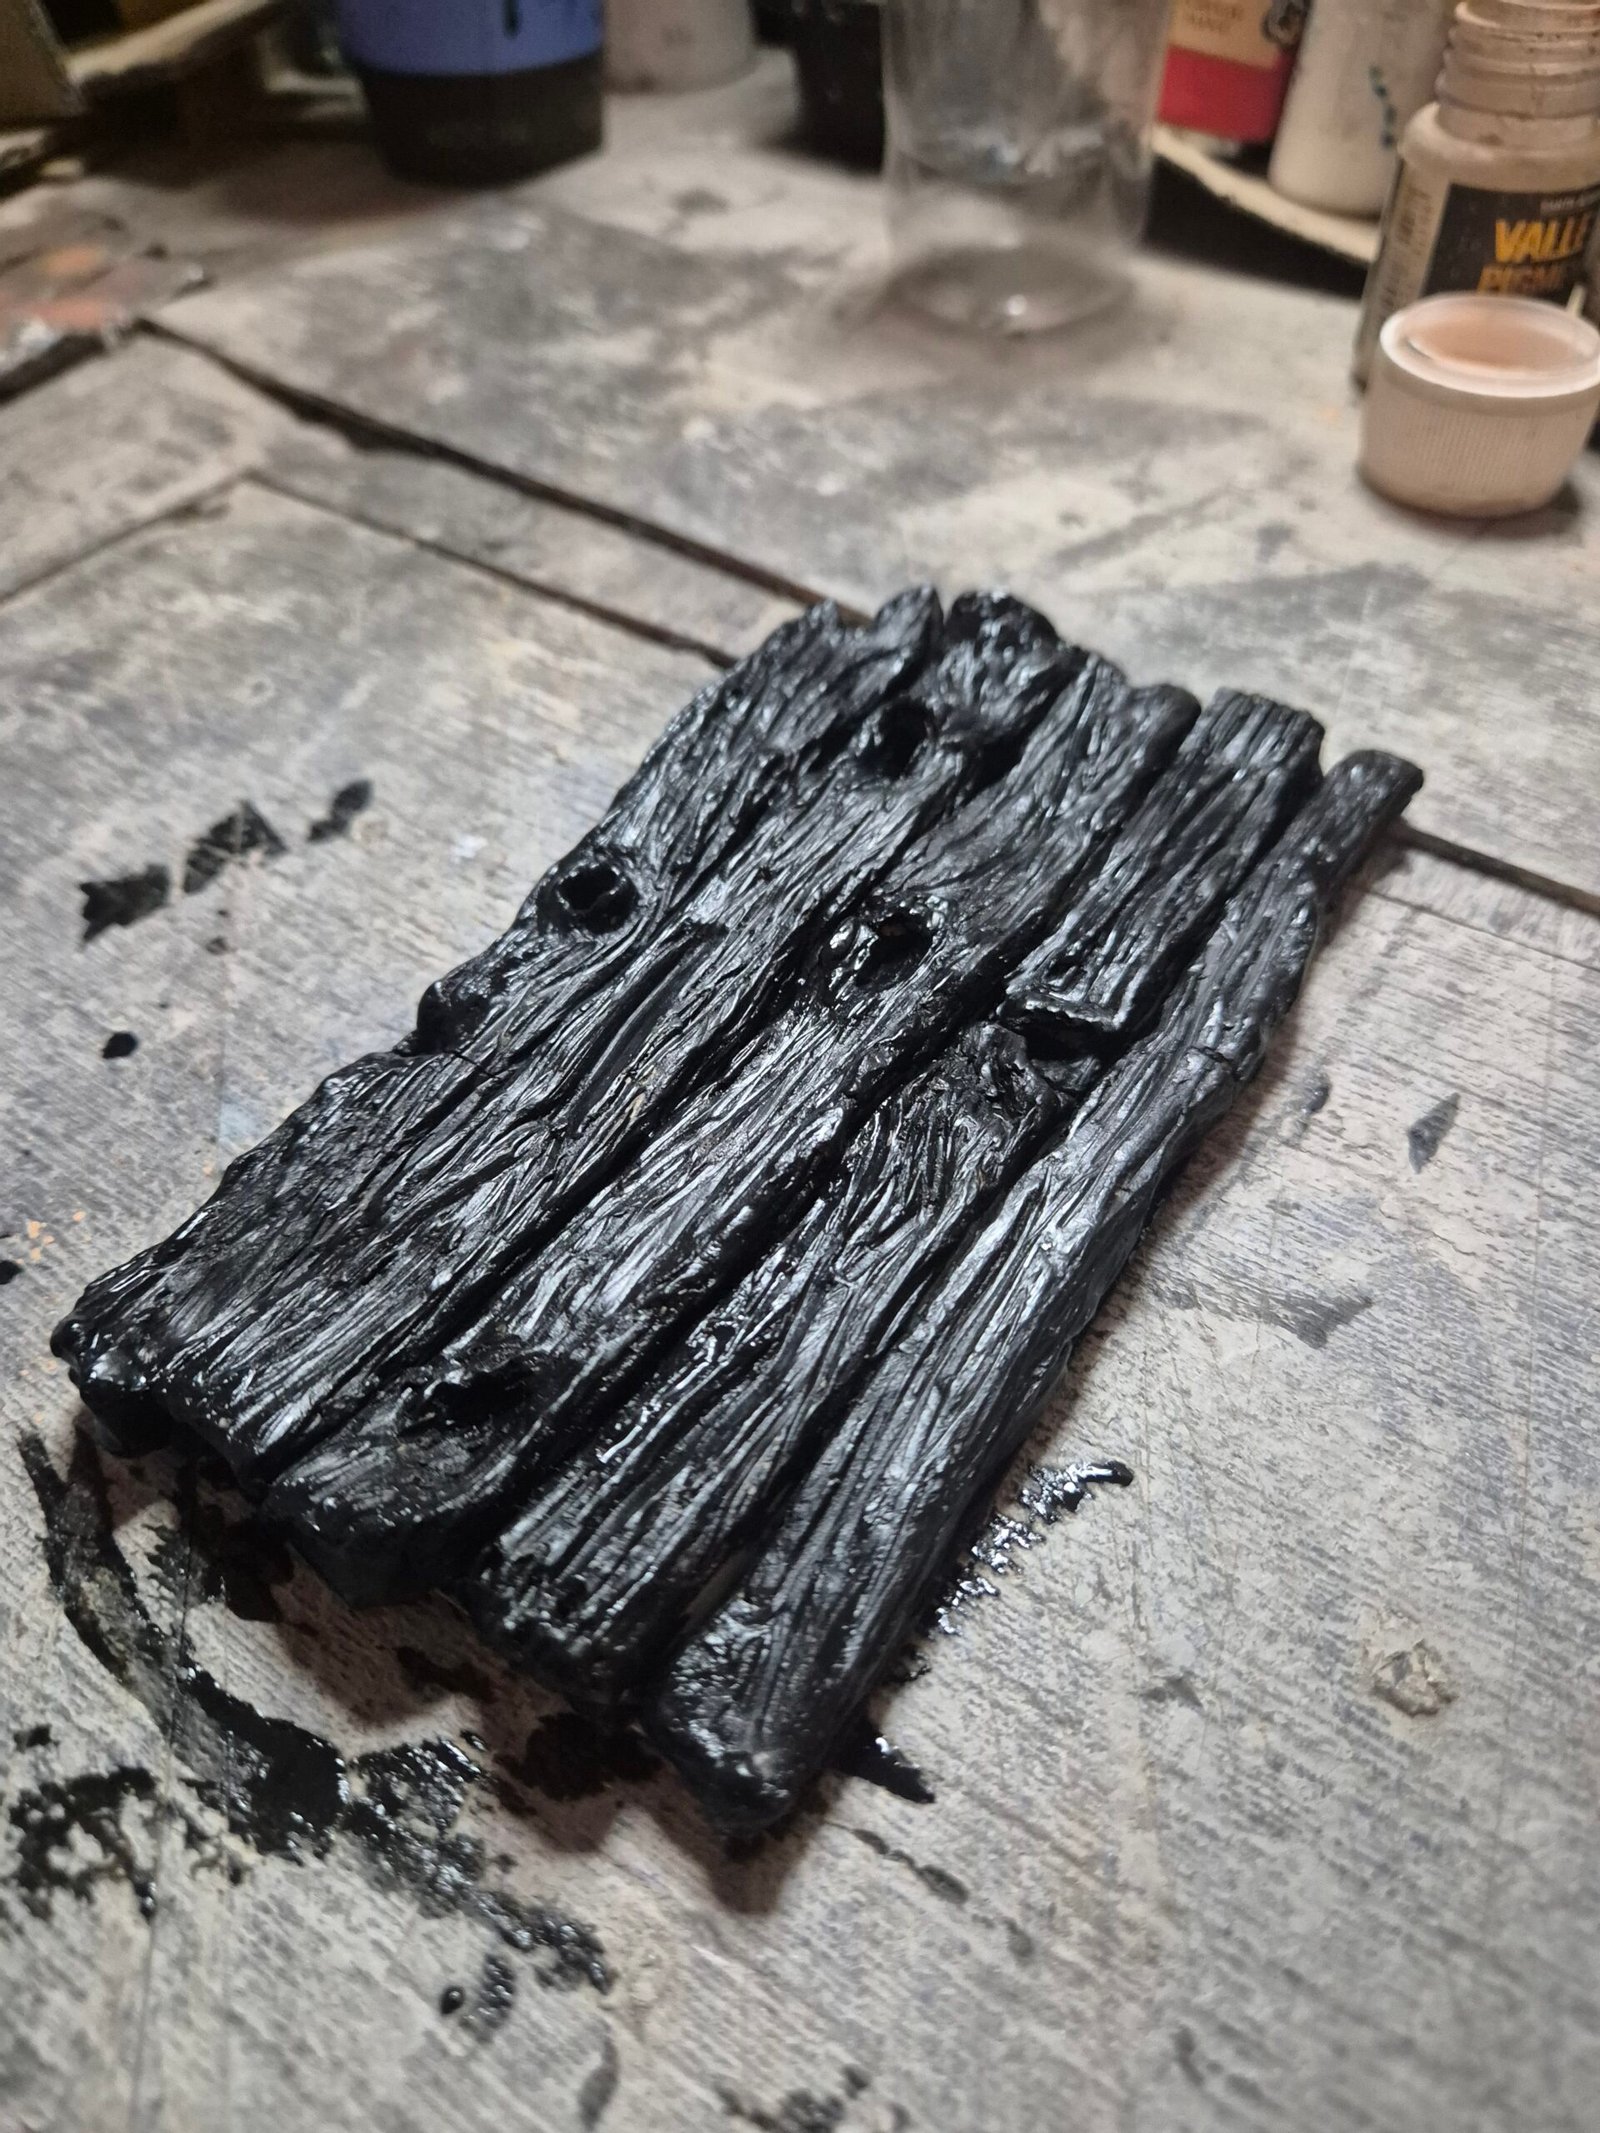
Before applying any colour, I gave the entire model a black primer made from black acrylic paint, PVA glue and a splash of water.
This not only helps strengthen and protect the clay but also creates a much better surface for painting. Without a primer, I have found that air dry clay absorbs a huge amount of paint, making it much more expensive to finish.
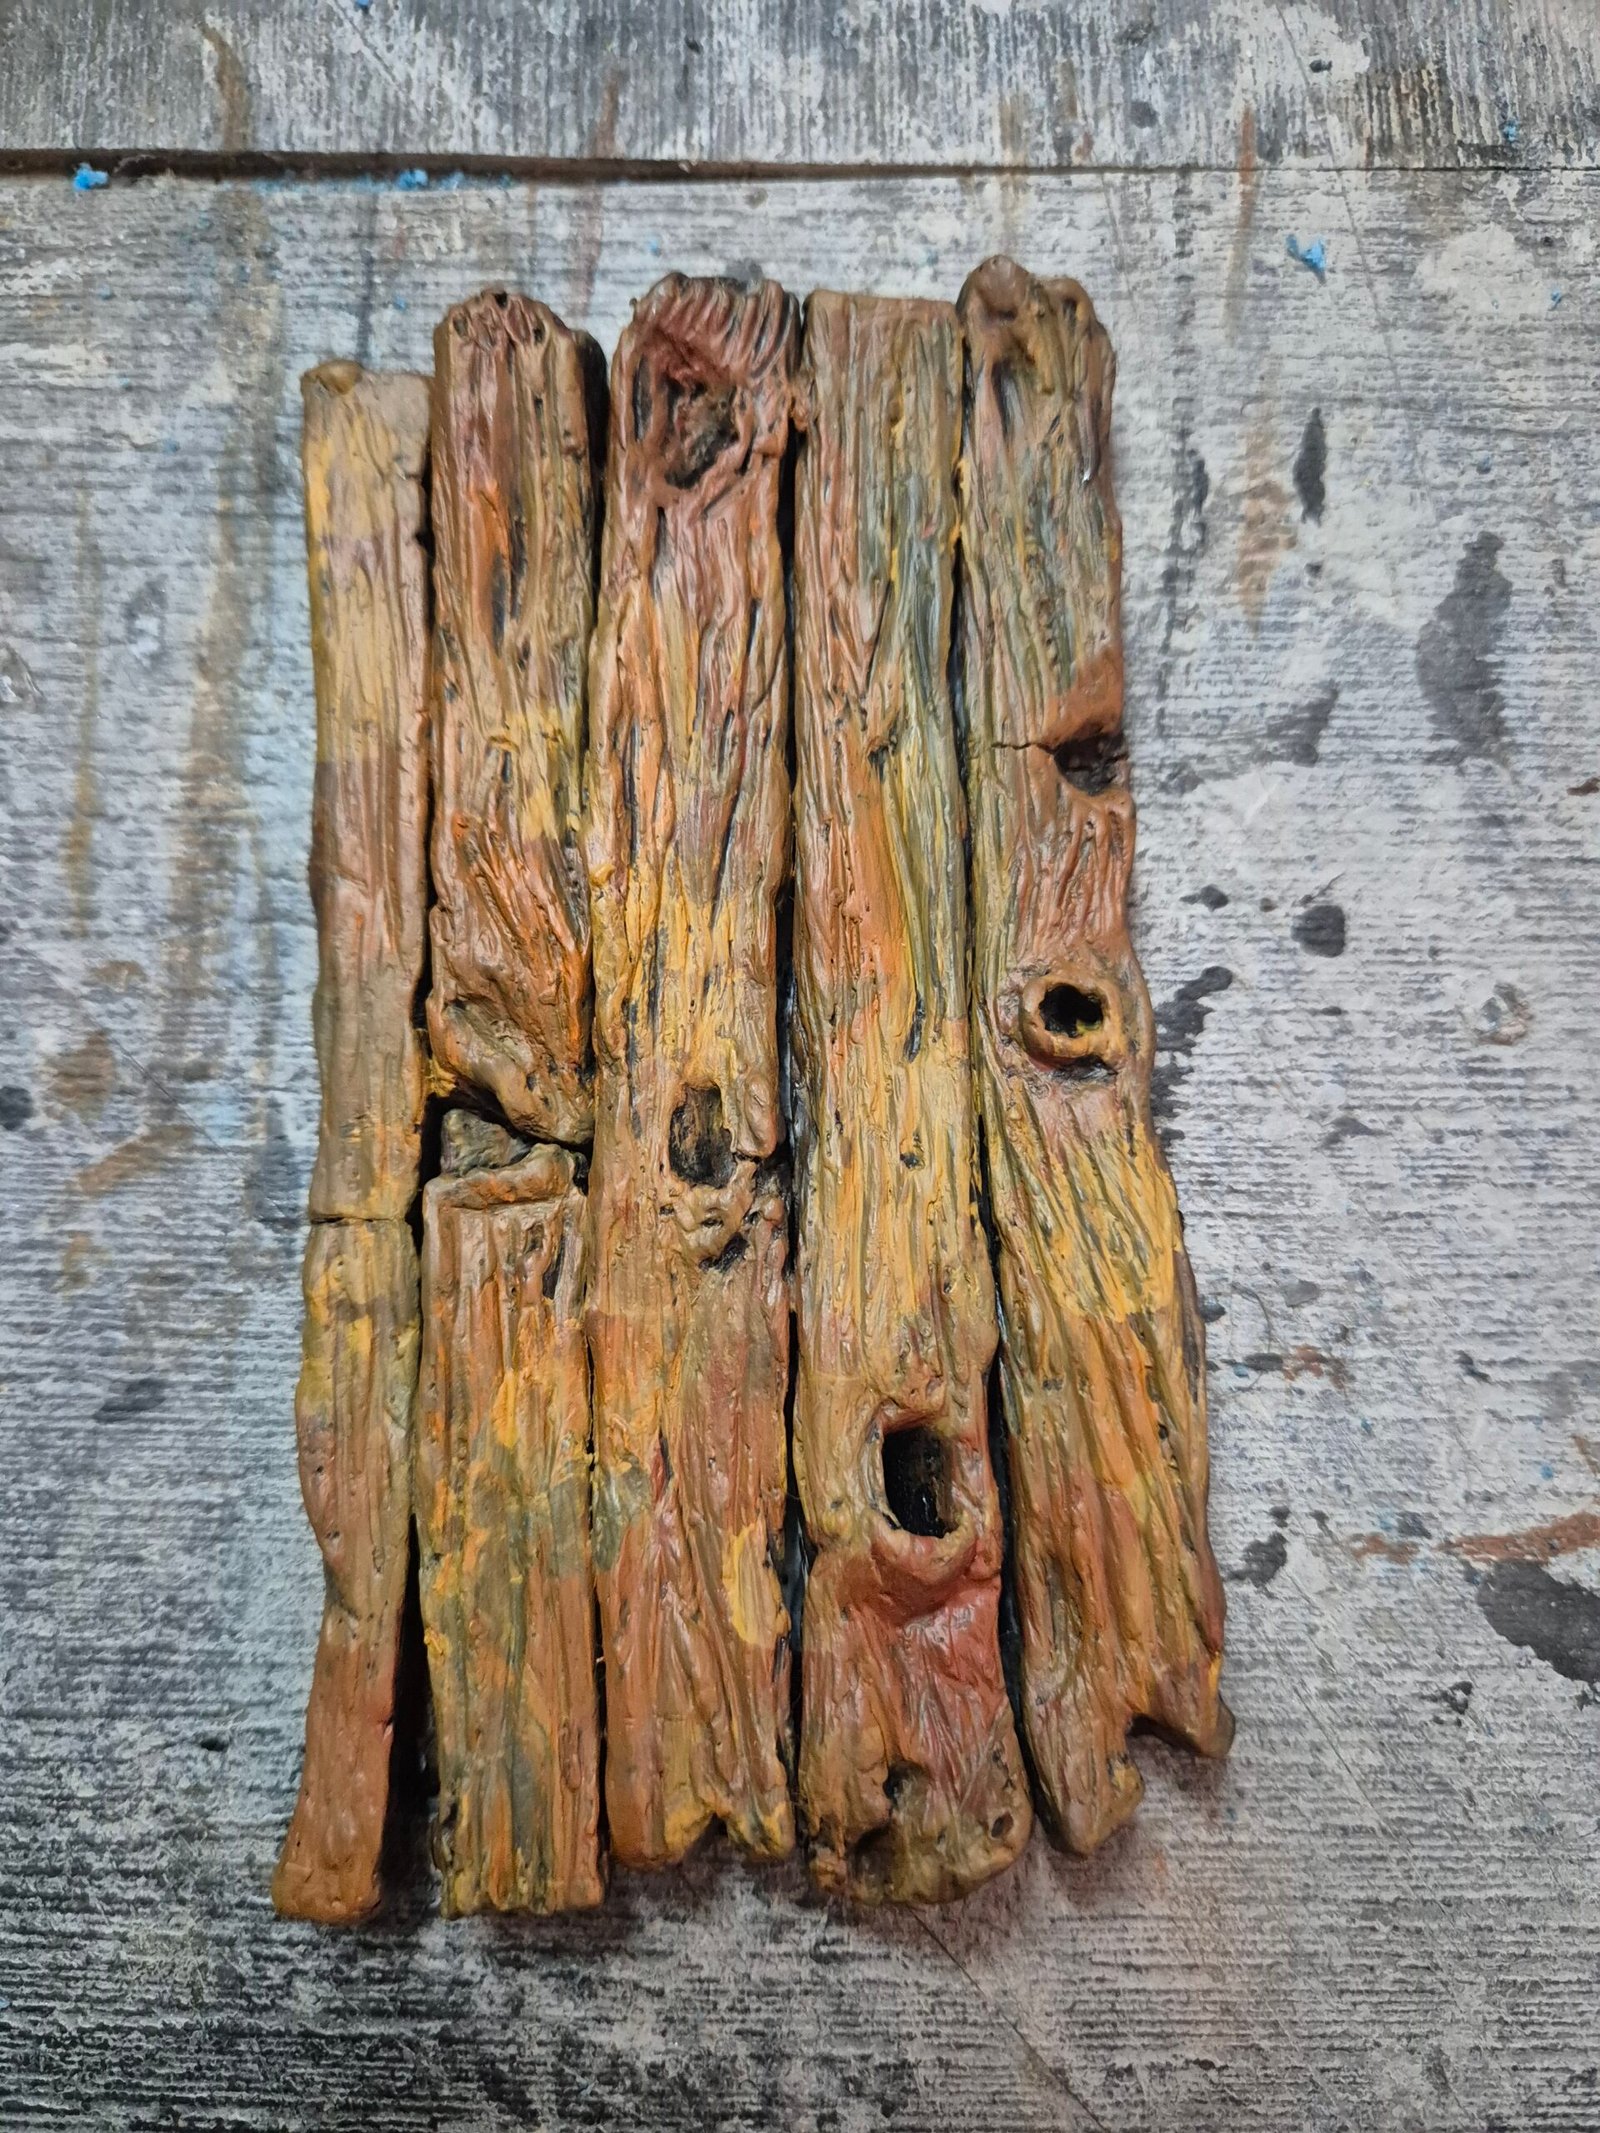
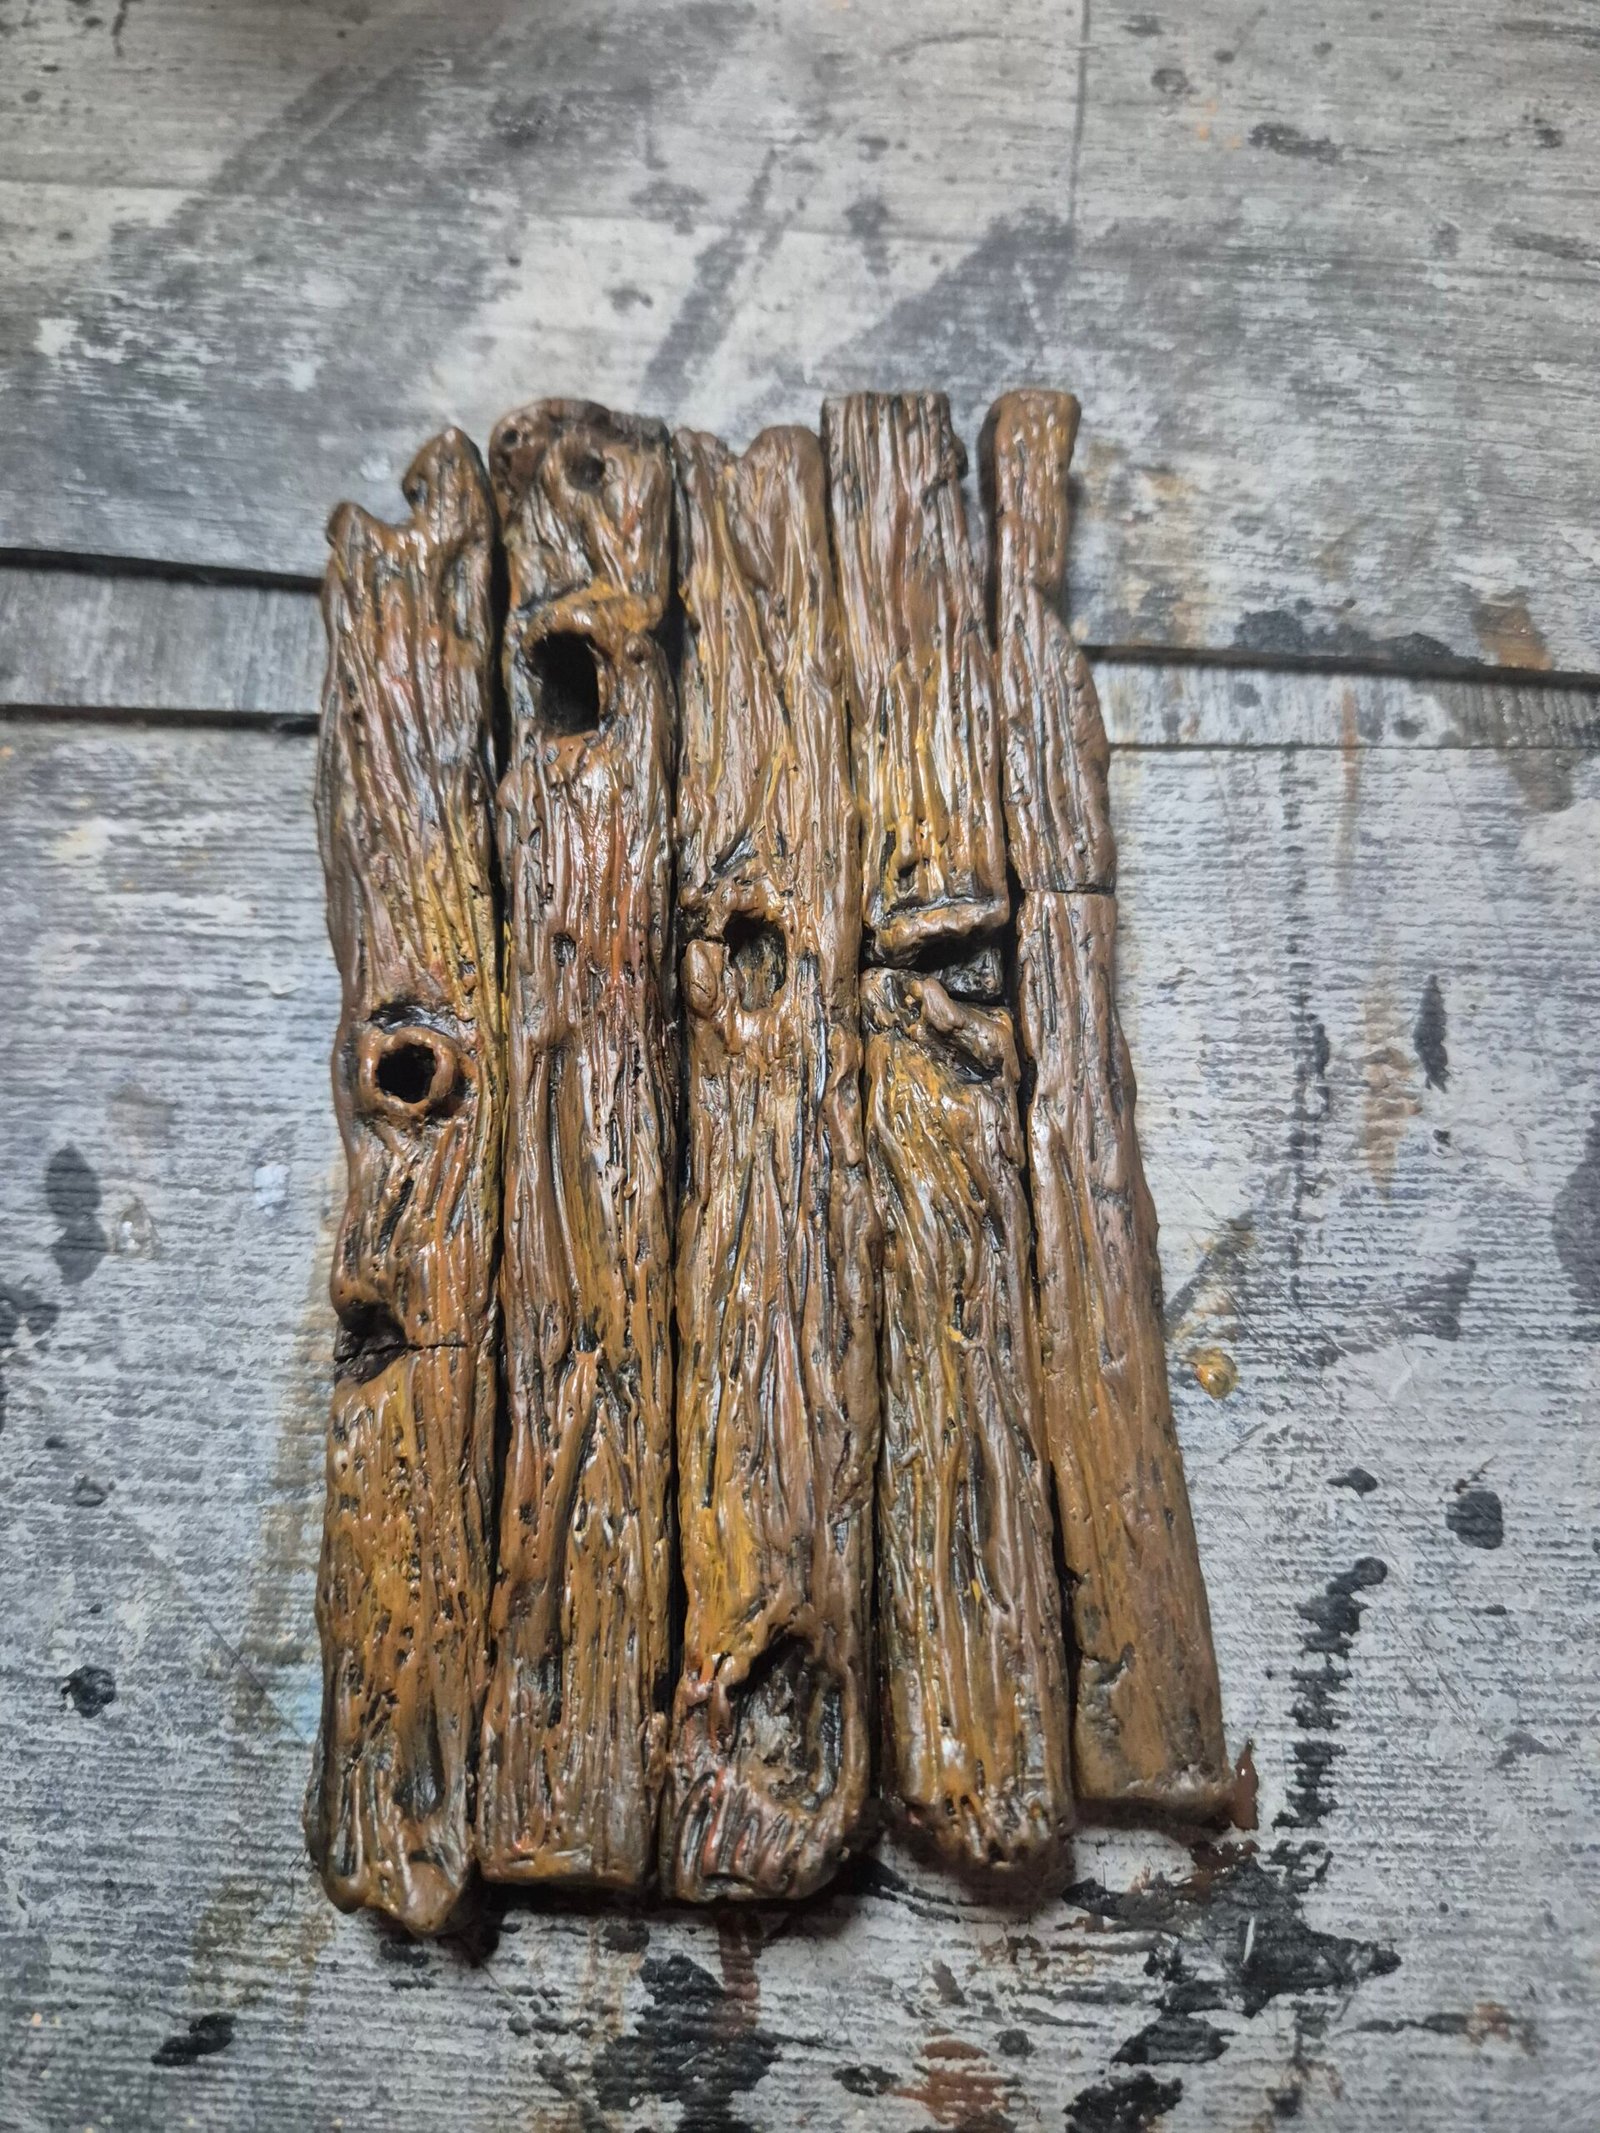
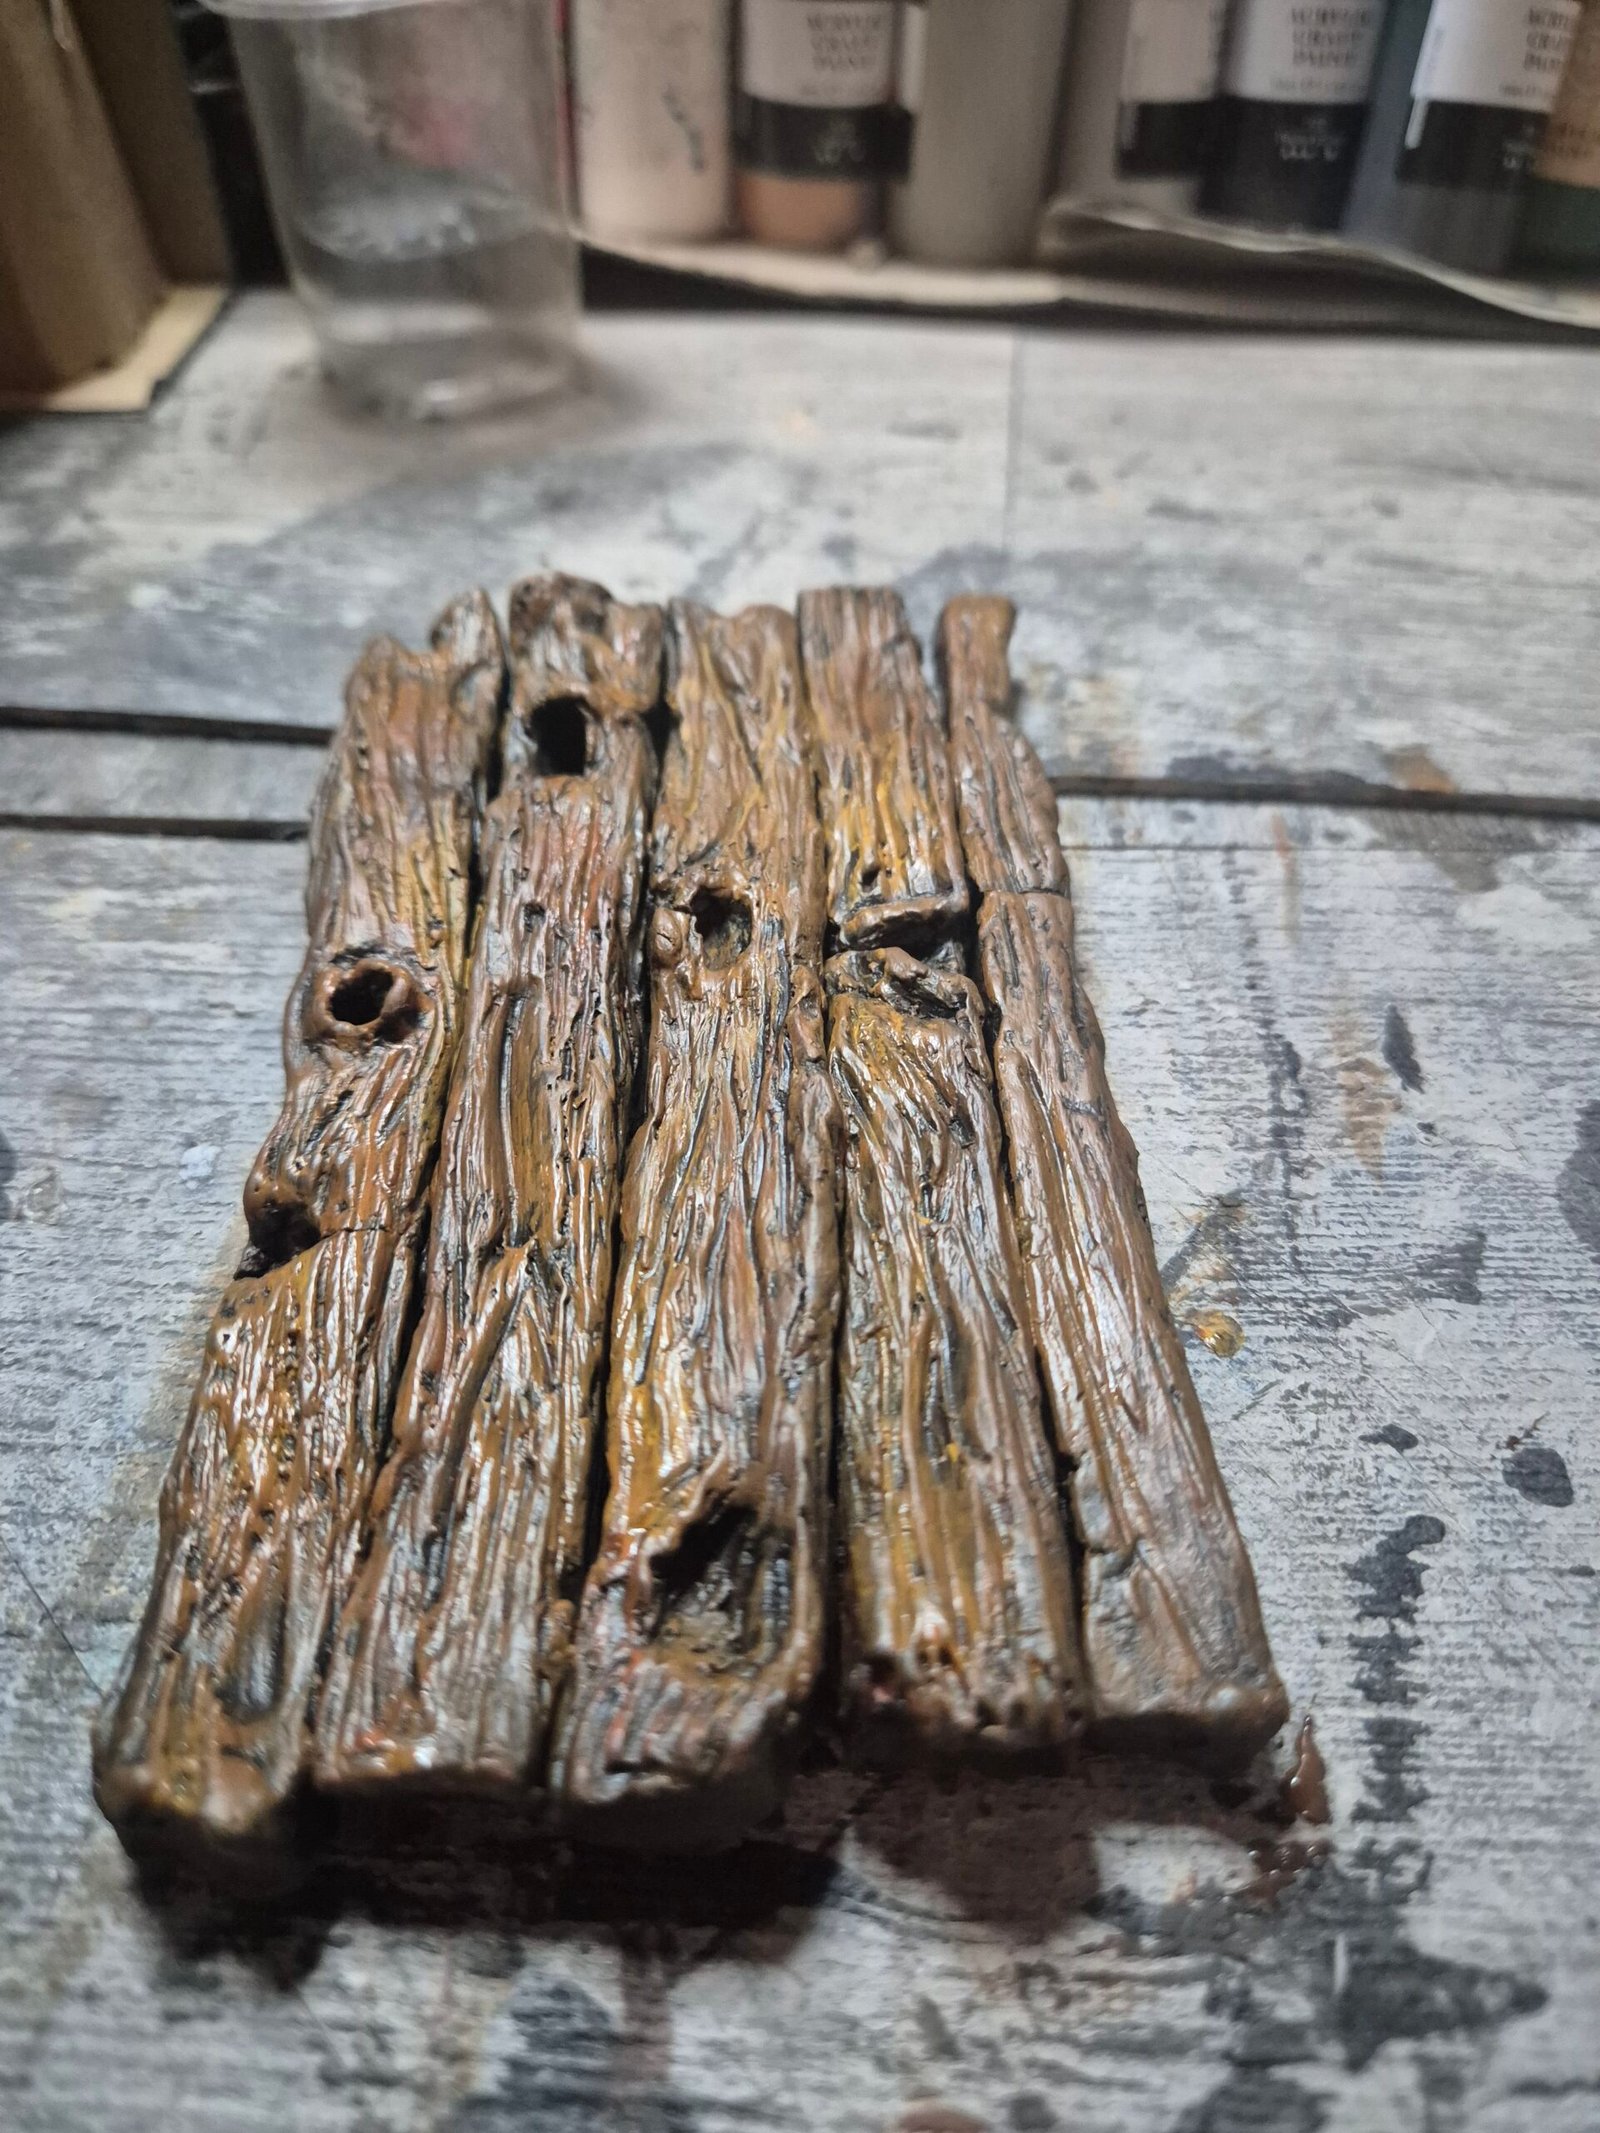
For the wood itself I used a mixture of colours including yellow, orange, red and light brown using Burnt Umber.
Real wood is rarely just one colour, so layering different tones helps create a much more natural finish.
At this stage the colours do look quite bold, but once everything is covered with a black wash and highlighted afterwards, the contrast becomes much more subtle and realistic.
Finishing Off
To complete the door, I sealed everything with a matt varnish.
This protects the paintwork while also removing any unwanted shine. Old timber is rarely glossy, especially in a medieval fantasy setting, so the matt finish helps bring everything together and gives the wood a much more believable appearance.
This post may contain affiliate links. If you purchase through these links, I may earn a small commission at no extra cost to you.